How to Add an Element
🎯 Learn how to add new elements to your AVstudio project using different methods.
This guide explains each option available for inserting UI elements such as buttons, sliders, switches, and more.
Available Elements
AVStudio currently supports the following UI elements:
textbuttonSliderText InputimageState controlspacerDpadkeypadsubpageSubpage ListvideoclockdateTimeplayerCircle SliderRound Slider(Premium)Html BlockShades Control(Premium)Autonomic Media Player(Premium)Color Picker(Premium)
Each element has its own properties panel and configuration options.
Elements marked as “Deprecated” are maintained for compatibility only and may be removed in a future release. You can view their individual documentation pages for detailed setup and usage.
Checkbox and Switch no longer appear in the current interface. Keep legacy pages only for backward compatibility.
From Page Containers
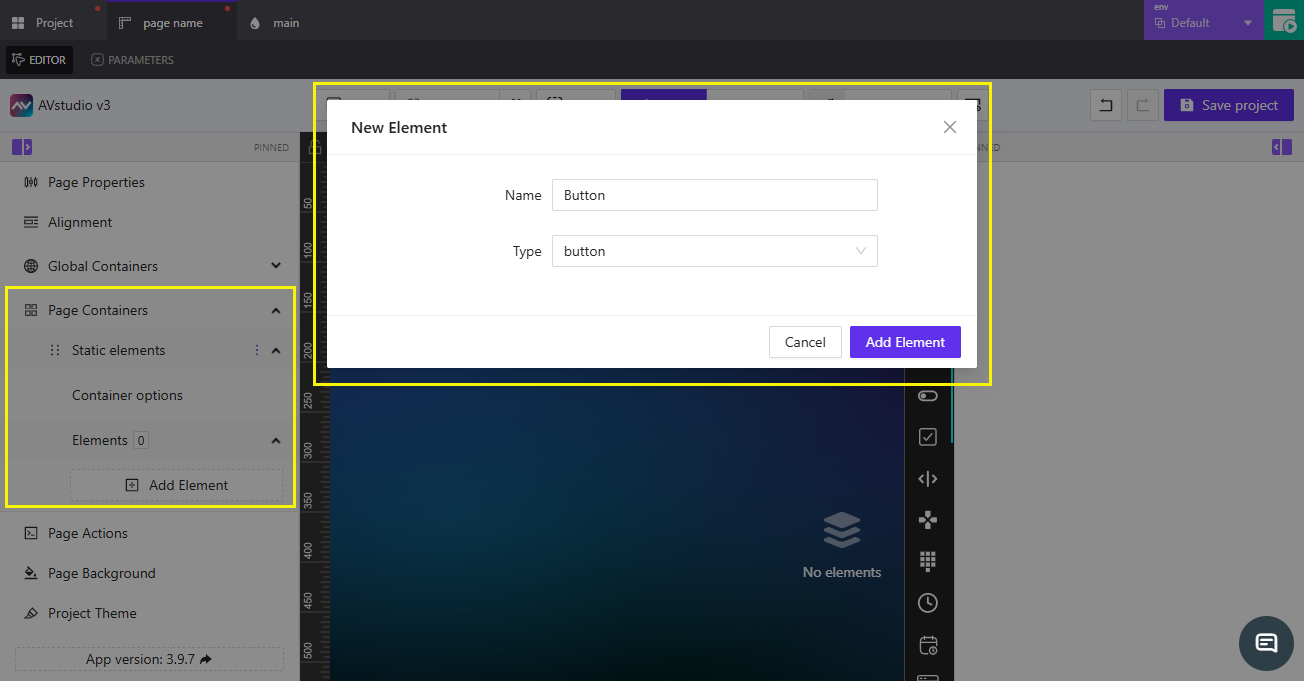
Follow these steps to add an element using the Page Containers panel:
- Go to
ContainerunderPage Containers. - Click the dropdown arrow and select
Elements. - Choose
Add Element, then select the desired type. - In the
Typedropdown, select the element (e.g.,Button,Switch,Image). - Click
Add Elementto insert it into the layout.
From the Editor (Right-Click)
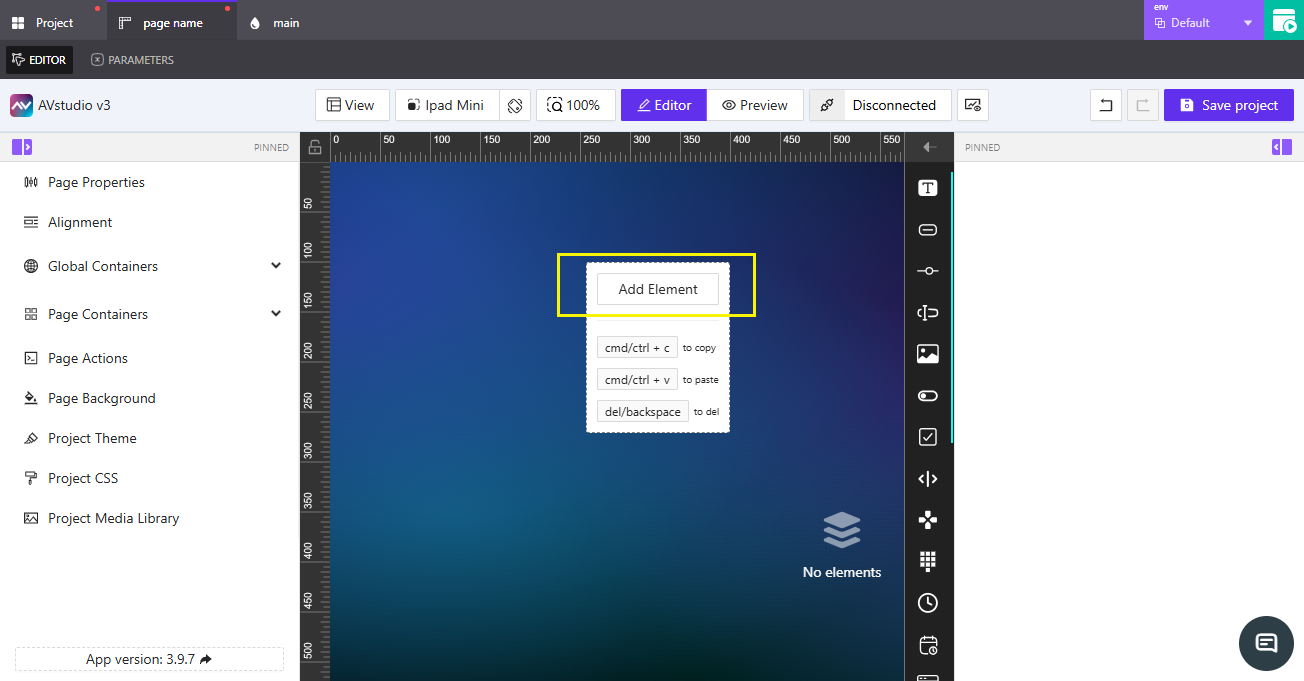
Right-click on the editor to quickly add an element using the context menu:
- Right-click anywhere on the
Editorworkspace. - Select
Add Element, then choose the desired type. - Click
Add Elementto confirm.
By Dragging from the Toolbar
Use drag-and-drop to visually place elements from the toolbar:
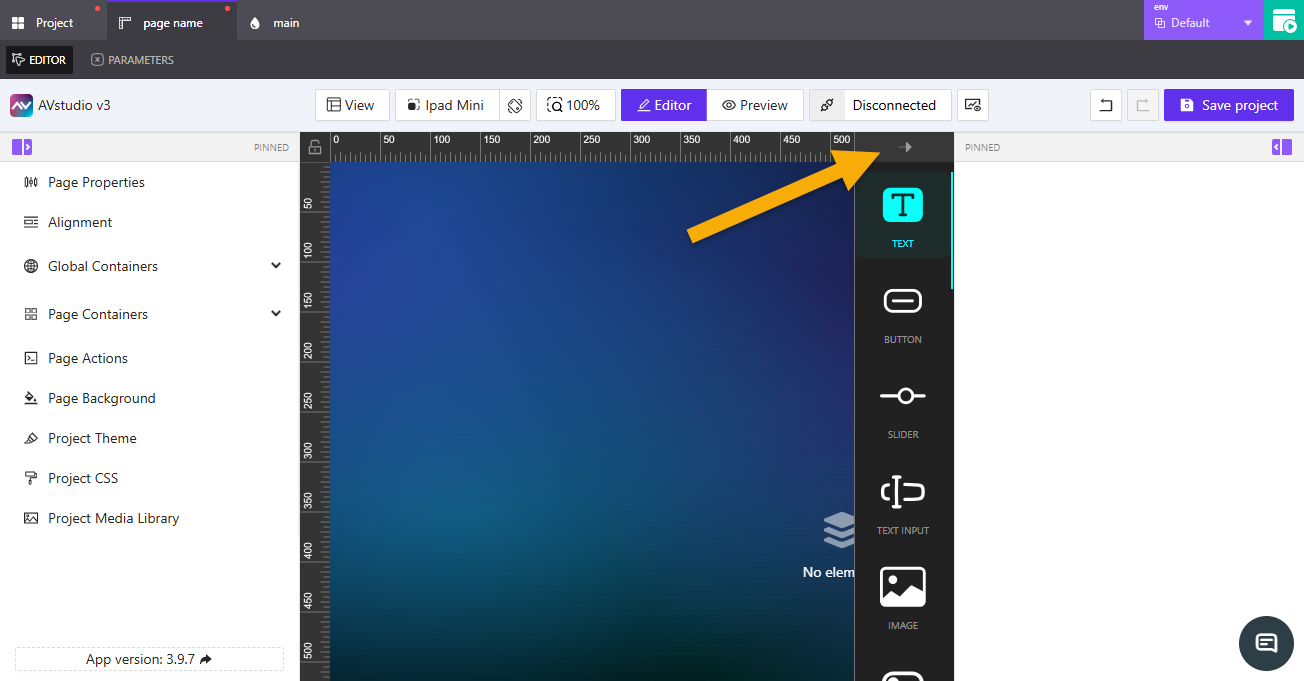
- On the right-hand side of the
Editor, locate the Elements Toolbar. - The toolbar shows element icons by default. If you prefer to view the element names, click the small arrow to expand the toolbar and display labels (e.g., Text, Button, Slider, Image).
- Find the element you want to add.
- Drag it from the toolbar onto the
Editorworkspace, then release to place it.
You can use this method on any page or subpage that opens in the Editor. It works for both responsive and adaptive pages.
- Use Page Containers for structured placement within container layouts.
- Use the Editor context menu for faster additions to any active page.
- Use drag-and-drop for visual positioning and layout refinement.
- Newly added elements appear immediately in the
Editorand property panel.
Frequently Asked Questions (FAQ)
Can I add multiple elements at once?
No, elements must be added one at a time, but you can duplicate them after placement.
Where do new elements appear by default?
They are added to the current container or active page within the Editor.
Can I reorder or move elements after adding them?
Yes. Drag the element directly within the Editor or use the hierarchy panel.
Summary
Add elements in three ways:
- From Page Containers (structured placement inside containers)
- From the editor’s context menu (quick insertion)
- By dragging from the elements toolbar (visual positioning)
Use whichever method best fits your current workflow; all elements appear immediately in the editor and properties panel.