DoorBird Intercoms Integration Guide
Before We Start
This document explains how to integrate multiple DoorBird intercoms into your AVStudio project using datasets and direct HTTP requests without requiring a control system. You'll learn how to organize DoorBird devices in your interface and communicate directly with them.
Understanding DoorBird API
DoorBird video intercoms feature a robust HTTP API that enables direct integration without requiring intermediary control systems. This API provides secure access to all critical intercom functions through standard web protocols, making it ideal for AVStudio projects.
Key capabilities available through the DoorBird API include:
- Live video streaming - Access real-time MJPEG video streams from the intercom's camera
- Door/gate control - Trigger relays to unlock doors or gates remotely
- Image capture - Request high-resolution still images from the camera on demand
- Event history - Retrieve logs of past interactions (doorbell presses, motion events)
- Notifications - Set up and manage push notifications for intercom events
- Light control - Activate the integrated infrared LEDs for night vision
The API uses standard HTTP authentication methods and returns data in structured formats that are easy to process with JavaScript functions in AVStudio. All communication happens over your local network, ensuring responsive performance with minimal latency.
For comprehensive documentation and the latest API specifications, refer to the official DoorBird developer resources at: https://www.doorbird.com/en/api
Setting Up Global Variables
To efficiently manage multiple DoorBird intercoms, we need to establish global project variables that will store the currently selected intercom's information.
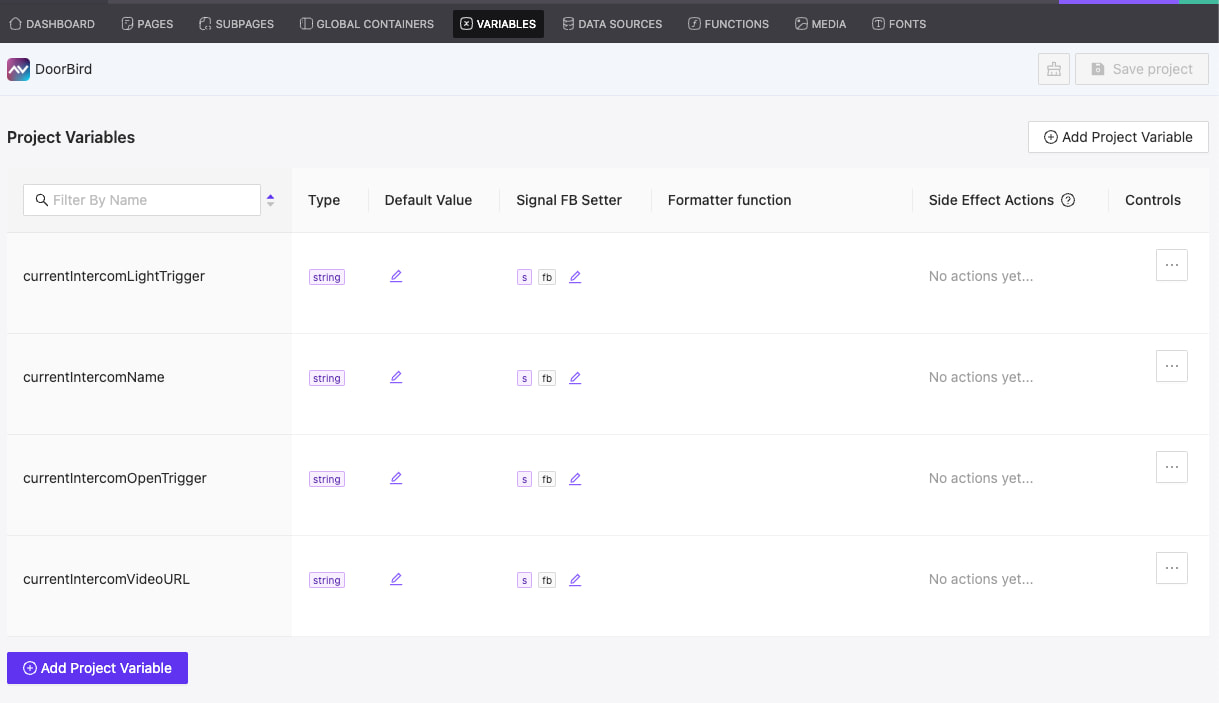
Required Project Variables
Create the following variables in your AVStudio project settings:
-
currentIntercomName(string)- Purpose: Stores the human-readable name of the currently active intercom
- Application: Displayed in UI components to indicate which intercom is being viewed
-
currentIntercomVideoURL(string)- Purpose: Contains the complete endpoint URL for accessing the live video stream
- Application: Used as the source for video streaming component
-
currentIntercomOpenTrigger(string)- Purpose: Holds the endpoint URL for the door/gate release mechanism
- Application: Used in HTTP action when the user activates door/gate controls
-
currentIntercomLightTrigger(string)- Purpose: Contains the endpoint for controlling the IR lighting system
- Application: Used when toggling night vision or lighting features of the active intercom
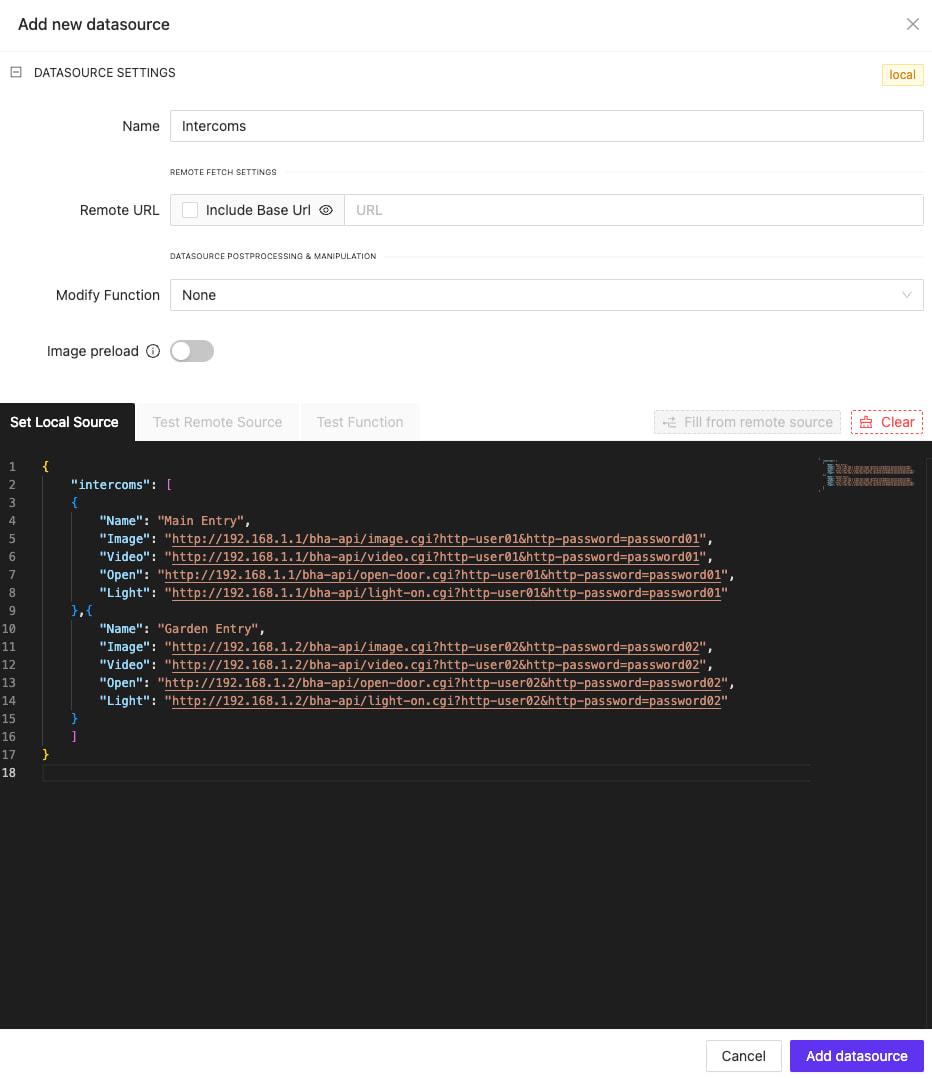
Setting Up Your Dataset
To integrate multiple DoorBird intercoms into AVStudio without a control system, you'll need to create a structured dataset containing all your devices and their API endpoints. This approach centralizes your device information and makes it easily accessible throughout your interface.
Dataset Structure
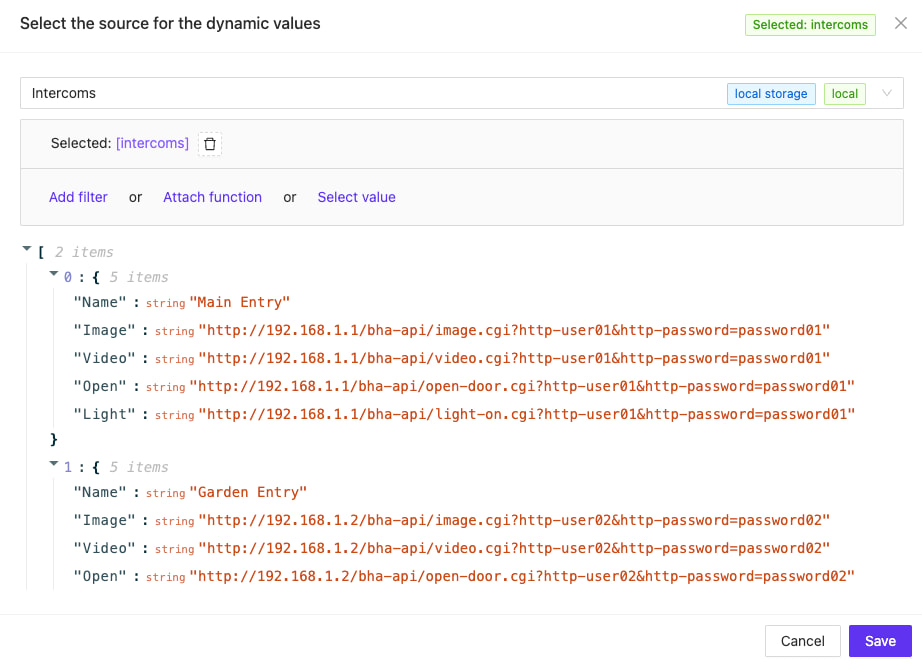
Create a JSON dataset with an intercoms array containing objects for each of your DoorBird devices:
{
    "intercoms": [
    {
        "Name": "Main Entry",
        "Image": "http://192.168.1.1/bha-api/image.cgi?http-user01&http-password=password01",
        "Video": "http://192.168.1.1/bha-api/video.cgi?http-user01&http-password=password01",
        "Open": "http://192.168.1.1/bha-api/open-door.cgi?http-user01&http-password=password01",
        "Light": "http://192.168.1.1/bha-api/light-on.cgi?http-user01&http-password=password01"
    },{
        "Name": "Garden Entry",
        "Image": "http://192.168.1.2/bha-api/image.cgi?http-user02&http-password=password02",
        "Video": "http://192.168.1.2/bha-api/video.cgi?http-user02&http-password=password02",
        "Open": "http://192.168.1.2/bha-api/open-door.cgi?http-user02&http-password=password02",
        "Light": "http://192.168.1.2/bha-api/light-on.cgi?http-user02&http-password=password02"
    }
    ]
}
Understanding Dataset Fields
Each intercom object contains:
- Name: A descriptive identifier for the intercom location (e.g., "Main Entry")
- Image: URL endpoint for retrieving a still image from the device
- Video: URL endpoint for accessing the MJPEG video stream
- Open: URL endpoint for triggering the door/gate relay
- Light: URL endpoint for activating the infrared LEDs
Authentication in URLs
Notice how each URL includes authentication parameters (http-user and http-password). The DoorBird API supports this basic authentication method directly in the URL, though for production systems you may want to consider more secure approaches.
Creating a Single Intercom Component
This section details how to create a dedicated page that displays the live video feed from your selected DoorBird intercom and provides controls for operating the door lock and light. If your project uses only one intercom, this single page will be sufficient.
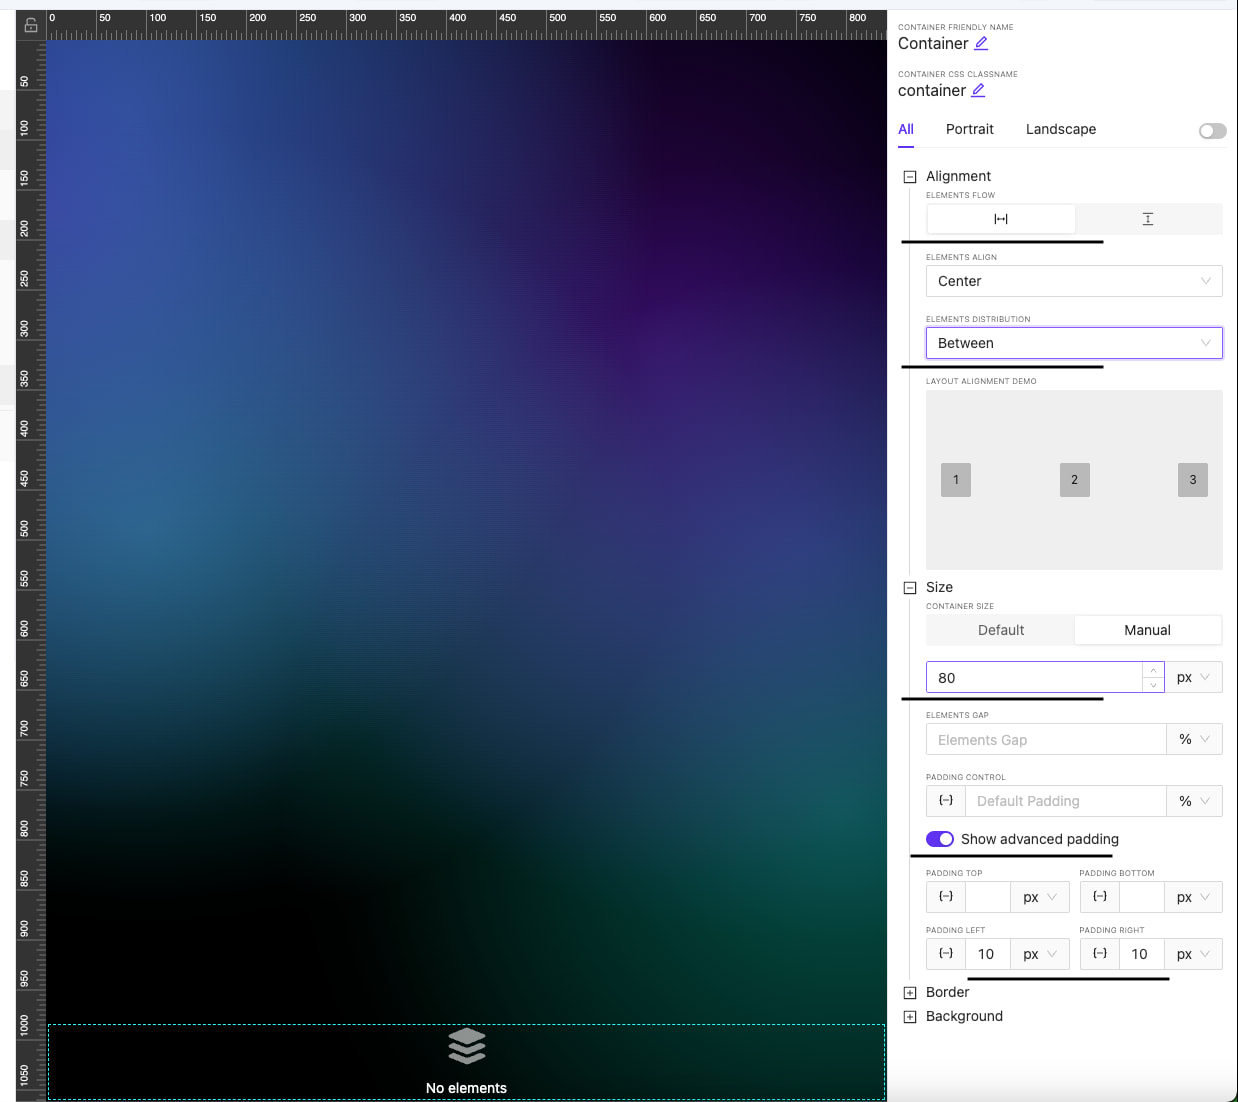
Step 1: Create the Basic Page Layout
- Create a new page in your project and name it "Camera Feed"
- Split the page into two containers:
- Top container: Will hold the intercom name and video feed
- Bottom container: Will contain the control buttons
- Set the bottom container height to 80px
- Configure the bottom container's alignment, padding, and element distribution settings for optimal button placement
Step 2: Add the Intercom Label
- Insert a text element in the top container
- Configure the text element to display the current intercom name
- Bind the text element to the
currentIntercomNameproject variable we created earlier - Position the label appropriately above where the video feed will appear

Step 3: Create the Video Feed Component
- Insert an HTML Block element below the label in the top container
- Set the HTML block's dimensions to:
- Width: 100%
- Height: 600px
- This will create adequate space for the video stream
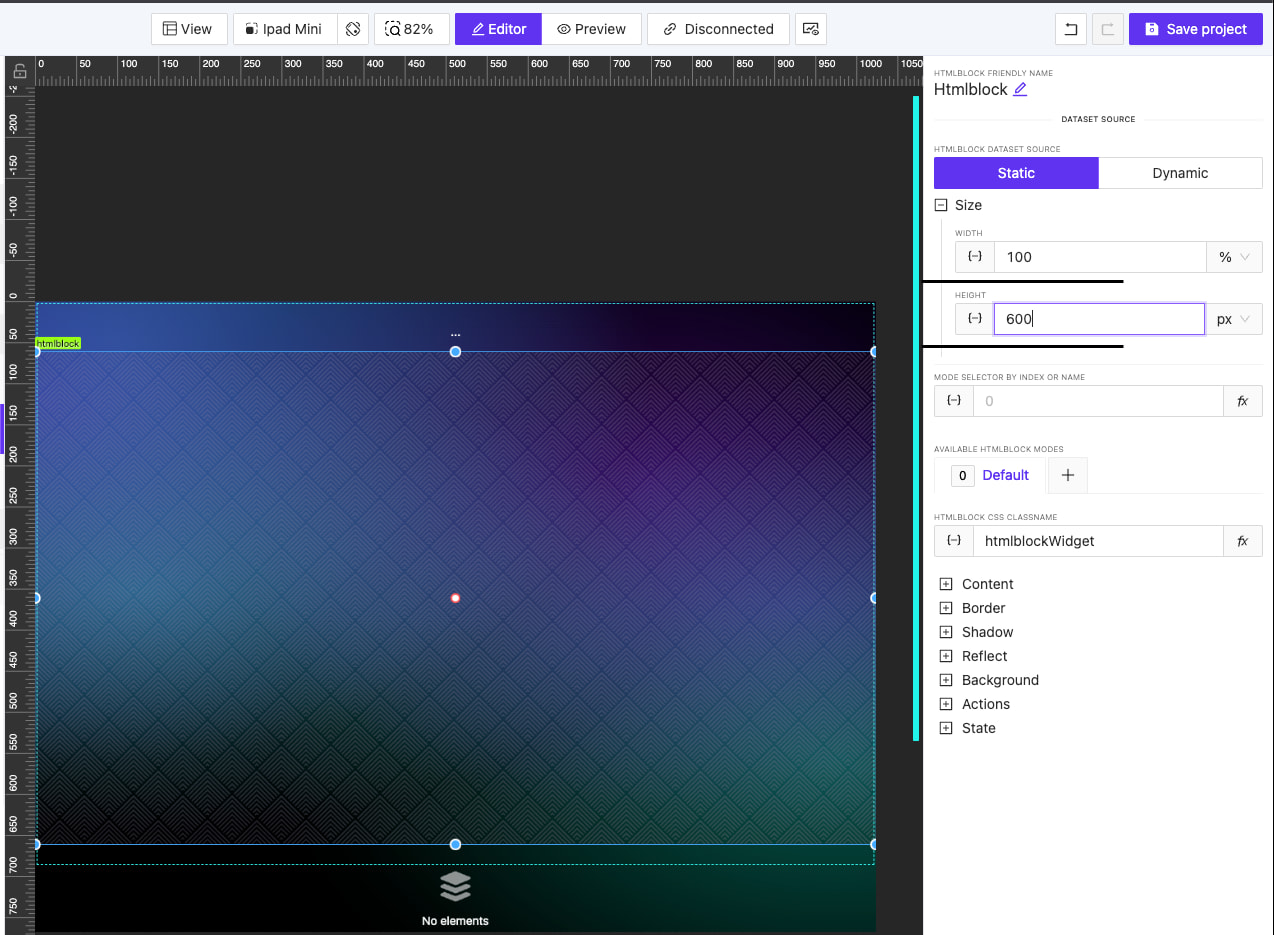
Step 4: Configure the HTML Block
Insert the following HTML code into the HTML block to create a responsive video feed display:
<html lang="en">
<head>
  <meta charset="UTF-8" />
  <title>DoorBird Live Stream</title>
  <style>
    img.doorbird-stream {
      width: auto;
      height: 580px;
      object-fit: cover;
    }
    .centered-container {
      display: flex;
      justify-content: center;
      align-items: center;
      height: 100%;
      width: 100%;
    }
  </style>
</head>
<body>
  <div class="centered-container">
    <img
      class="doorbird-stream"
      alt="DoorBird Live Stream"
      id="doorbird-img" />
  </div>
  <script>
    document.getElementById('doorbird-img').src = window?.avgatorStudio?.getVariableByName({ name: 'currentIntercomVideoURL' });
  </script>
</body>
</html>
Understanding the HTML Implementation
The HTML code above:
- Creates a responsive container that centers its contents
- Adds an image element that will display the MJPEG stream from the DoorBird device
- Uses CSS to ensure the video stream displays correctly at 580px height
- Includes JavaScript that dynamically sets the image source to the URL stored in our
currentIntercomVideoURLproject variable
This approach ensures that whenever a user selects a different intercom (changing the currentIntercomVideoURL variable), the video feed will automatically update to show the newly selected stream.
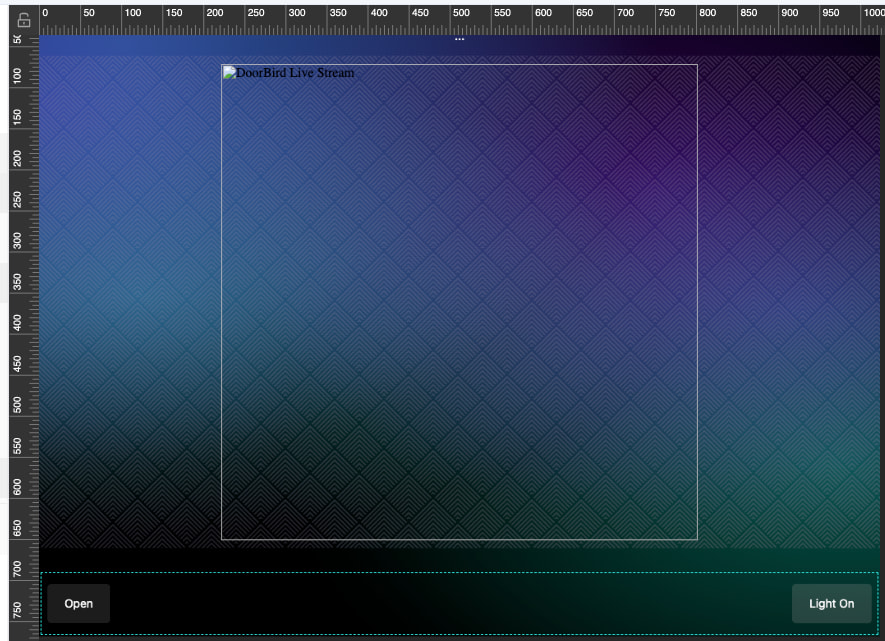
Controls
In the following sections, we'll add control buttons to the bottom container that will allow users to:
- Open the door/gate by triggering the
currentIntercomOpenTriggerendpoint - Toggle the IR light using the
currentIntercomLightTriggerendpoint
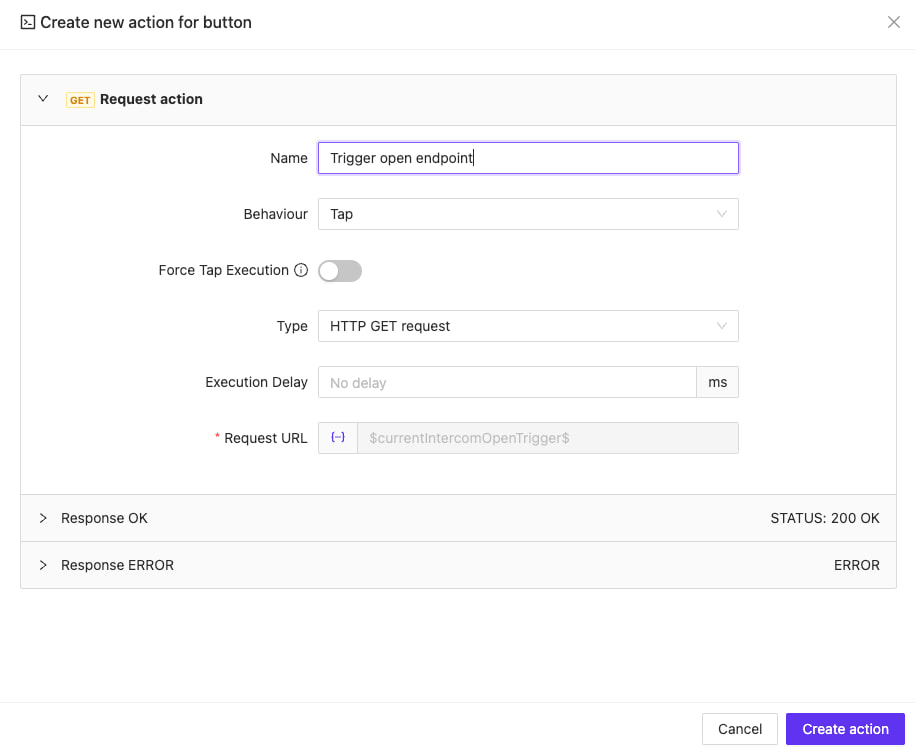
Adding the Door Open Button
- In the bottom container, add a new Button element
- Set the button's label to "Open"
- Add an HTTP action to the button:
- Select HTTP GET request as the action type
- In the Request URL field, bind to the
currentIntercomOpenTriggerproject variable
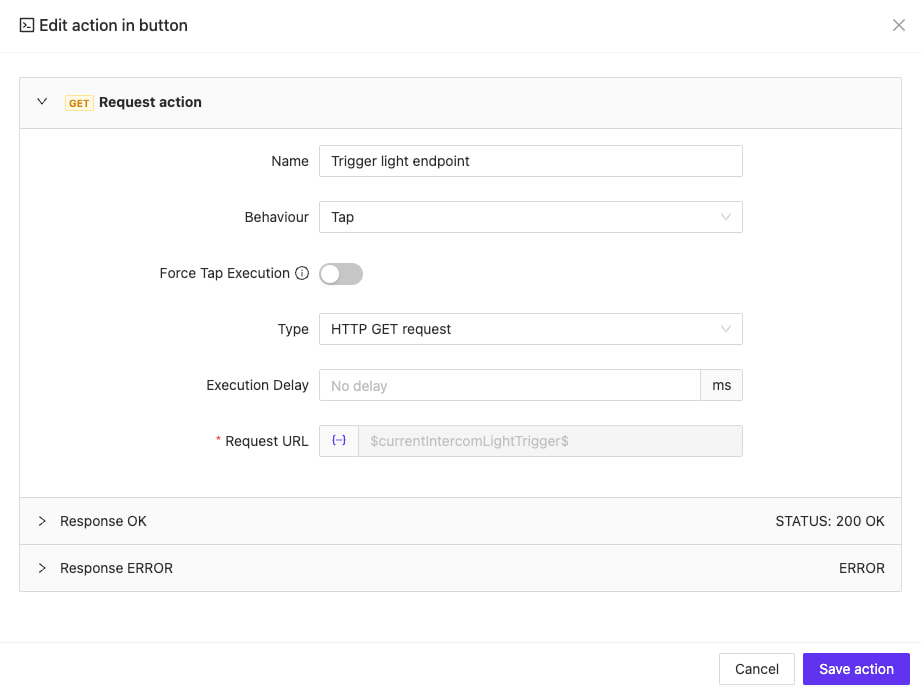
Adding the Light Control Button
- Clone the "Open" button to maintain consistent styling
- Modify the cloned button's label to "Light On"
- Change the button's action:
- Keep the HTTP GET request action type
- Update the Request URL field to bind to
currentIntercomLightTriggerinstead
These controls will complete our single intercom component interface.
Creating a Intercoms Menu entry
To efficiently manage multiple DoorBird intercoms, we'll create a reusable subpage component that represent a single intercom device within a list.
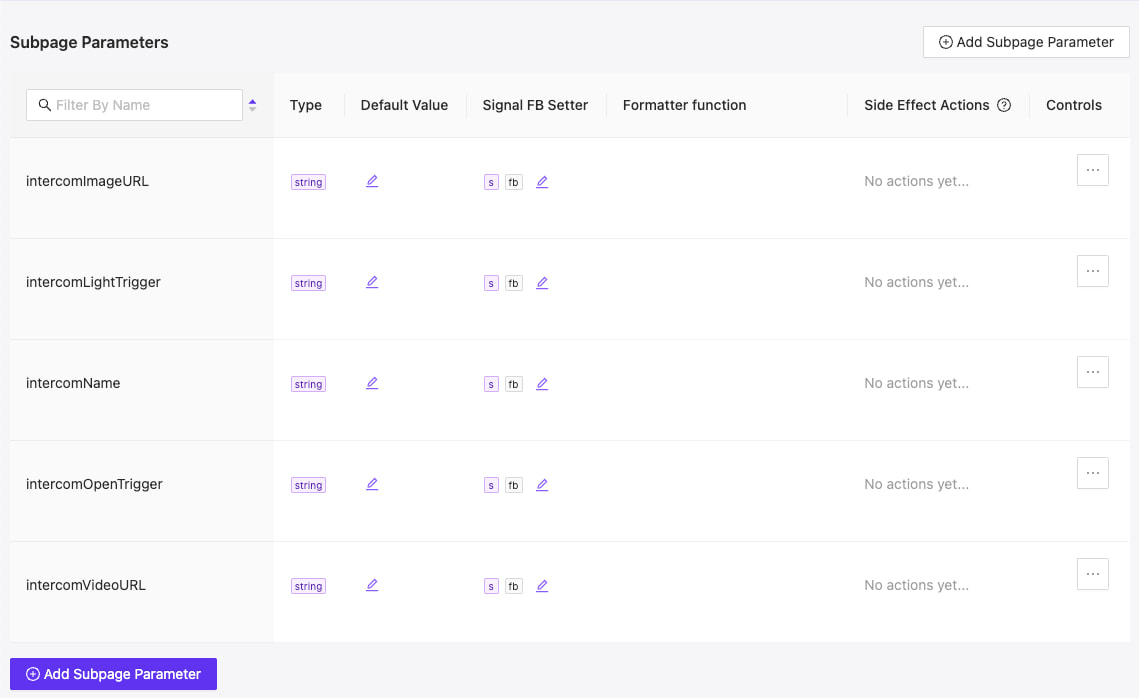
Component Parameters
Create a subpage with the following input parameters to handle each DoorBird device:
-
intercomImageURL(string)- Purpose: Provides the endpoint for retrieving the live image feed
- Format: Complete URL including authentication credentials
- Example:
http://192.168.1.1/bha-api/image.cgi?http-user01&http-password=password01 - Usage: Used as the source for the background or image element
-
intercomVideoURL(string)- Purpose: Provides the endpoint for retrieving the live video feed
- Format: Complete URL including authentication credentials
- Example:
http://192.168.1.1/bha-api/video.cgi?http-user01&http-password=password01 - Usage: Used as the value which we will pass to the current intercom's video stream
-
intercomOpenTrigger(string)- Purpose: Stores the endpoint to activate the door/gate release
- Format: Complete URL including authentication credentials
- Example:
http://192.168.1.1/bha-api/open-door.cgi?http-user01&http-password=password01 - Usage: Triggered when the user presses the "Open Door" button
-
intercomLightTrigger(string)- Purpose: Provides the endpoint to control IR lighting
- Format: Complete URL including authentication credentials
- Example:
http://192.168.1.1/bha-api/light-on.cgi?http-user01&http-password=password01 - Usage: Triggered when the user toggles the lighting control
-
intercomName(string)- Purpose: Identifies the specific intercom location
- Example: "Main Entry" or "Garden Gate"
- Usage: Displayed as a label within the component
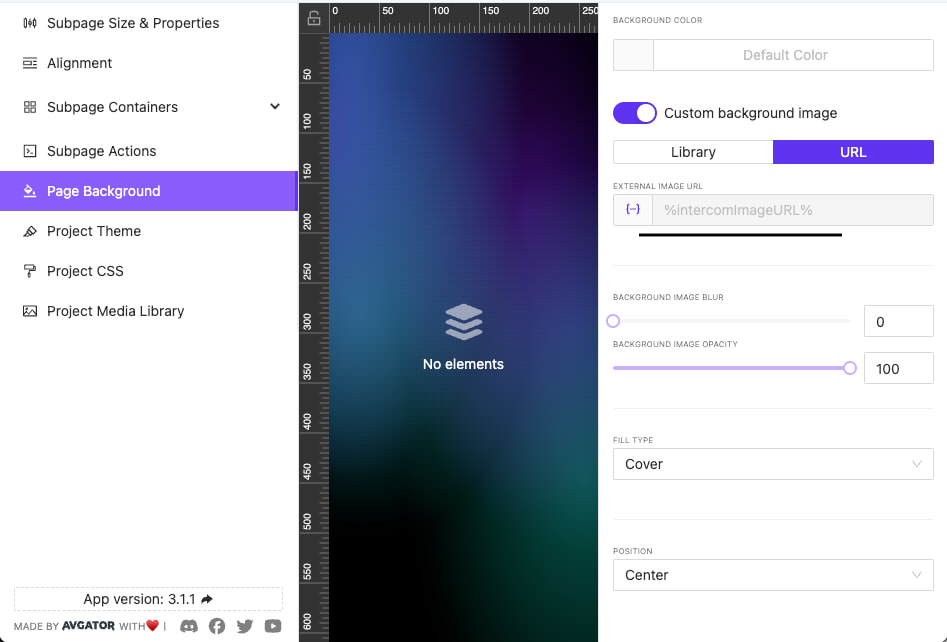
Component Design
Design your intercom component with these essential elements:
Video Feed Display
Set the component background that loads the intercomImageURL image
Creating the Interactive Selection Area
The menu entry for each intercom needs an interactive area that displays the intercom's name and allows users to select it for viewing the live video feed. Let's create this component:
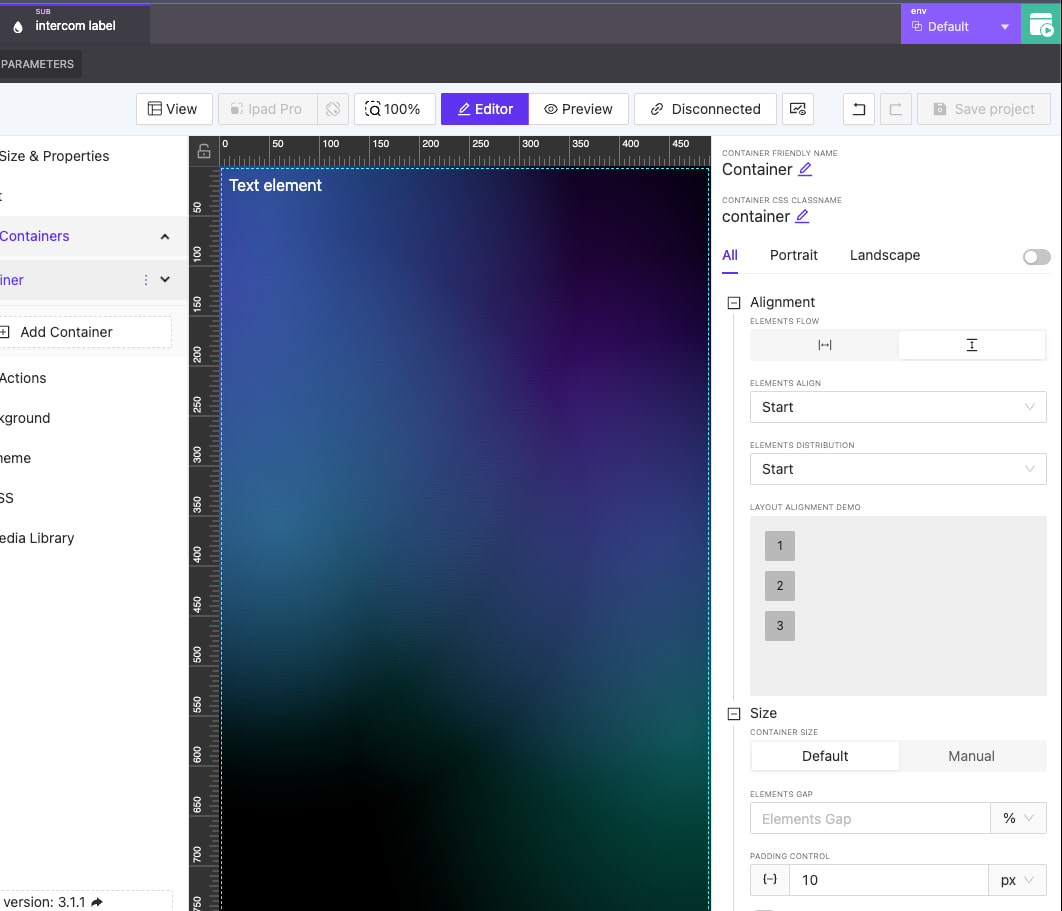
Step 1: Create the Intercom Label Subpage
First, we'll create a reusable label component to display the intercom name:
- Create a new subpage named "Intercom Label"
- Add a single container to the subpage
- Configure the container:
- Set Alignment to "Start : Start" (top-left corner)
- Add 10px padding on all sides
- This positioning ensures the label appears in a consistent location
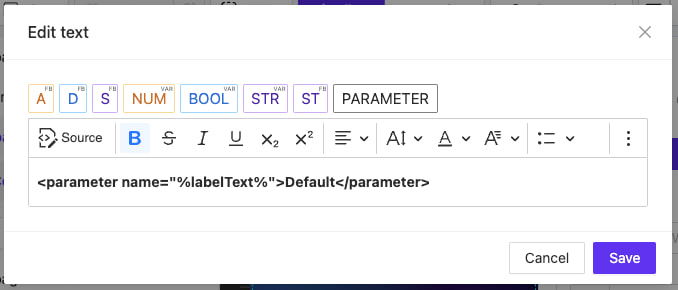
- Add a string parameter named
labelTextto this subpage- This parameter will receive the intercom name from the parent component
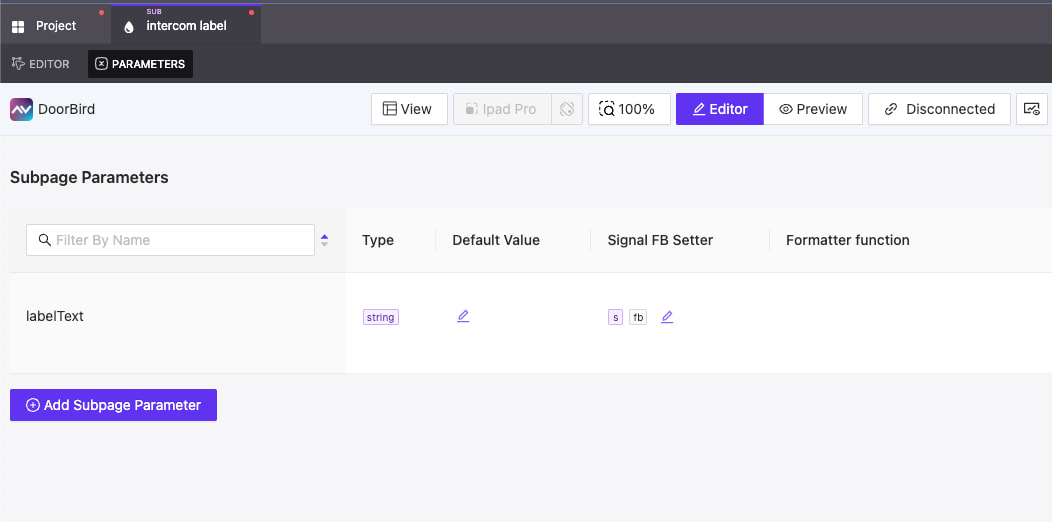
- Add a text element to the container
- Bind this text element to the
labelTextparameter
Step 2: Add the Label to the Intercom Tile
Now we'll integrate this label into our main intercom tile component:
- In the main intercom tile subpage, ensure you have two containers:
- The top container will display the intercom image and label
- The bottom container (80px height) will contain control buttons
- Add the "Intercom Label" subpage to the top container
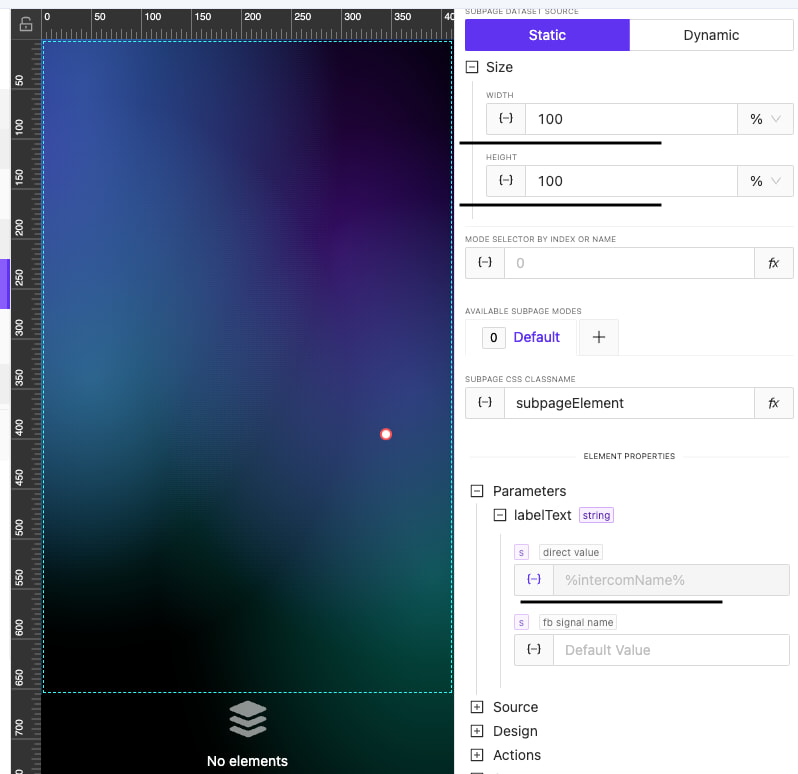
- Configure the subpage instance:
- Set Width and Height to 100% to fill the container
- Bind the
labelTextparameter to theintercomNameparameter of the parent component
Step 3: Configure Selection Actions
When a user clicks on an intercom label, we need to update global variables and navigate to the video feed:
-
Add a Click actions to the Intercom Label component a. Set the
currentIntercomNameproject variable from theintercomNameparameter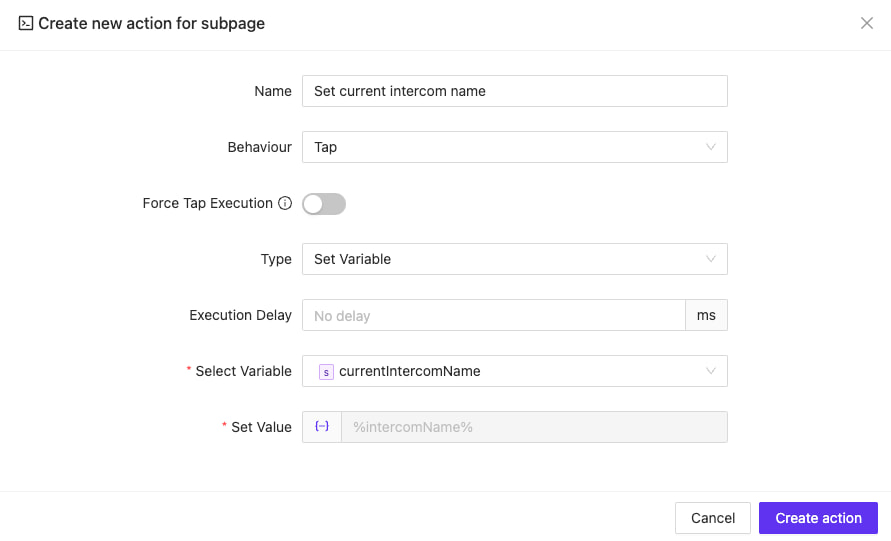
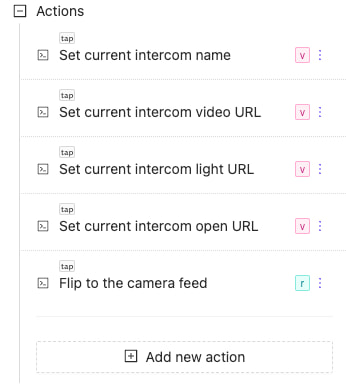
b. Similarly, set these project variables:
currentIntercomVideoURLfromintercomVideoURLparametercurrentIntercomLightTriggerfromintercomLightTriggerparametercurrentIntercomOpenTriggerfromintercomOpenTriggerparameter
c. Add a Flip action as the final step to navigate to the "Camera Feed" page

-
Verify all actions are properly sequenced to ensure they execute in the correct order
Door Control Button
- In the bottom container, add a new Button element
- Set the button's label to "Open"
- Add an HTTP action to the button:
- Select HTTP GET request as the action type
- In the Request URL field, bind to the
intercomOpenTriggersubpage parameter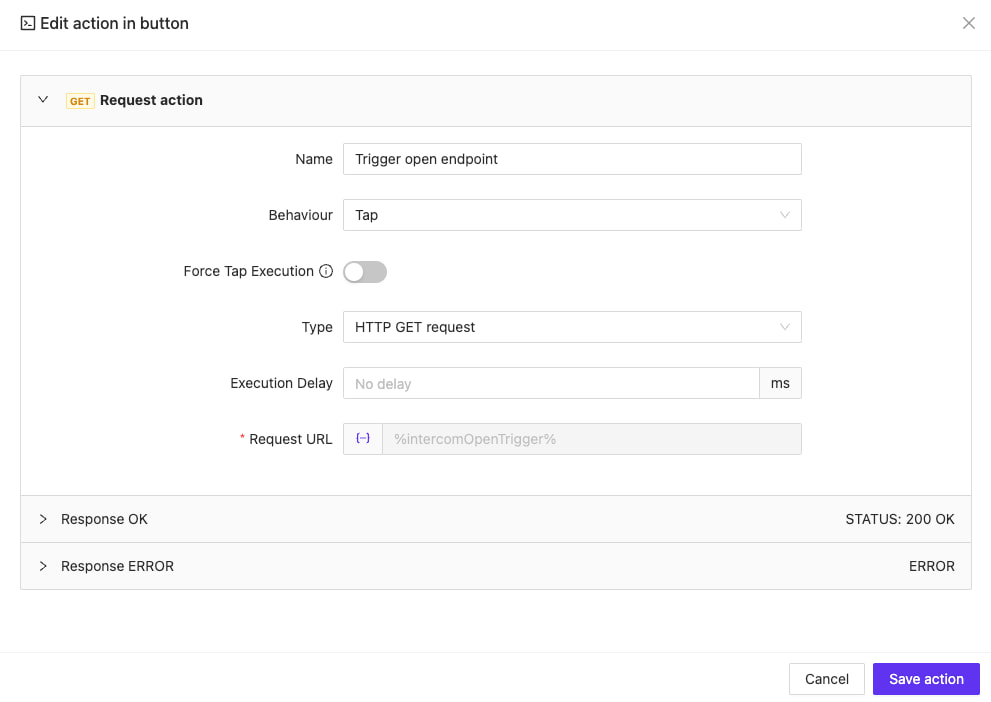
Light Toggle Button
- Clone the "Open" button to maintain consistent styling
- Modify the cloned button's label to "Light On"
- Change the button's action:
- Keep the HTTP GET request action type
- Update the Request URL field to bind to
intercomLightTriggersubpage parameter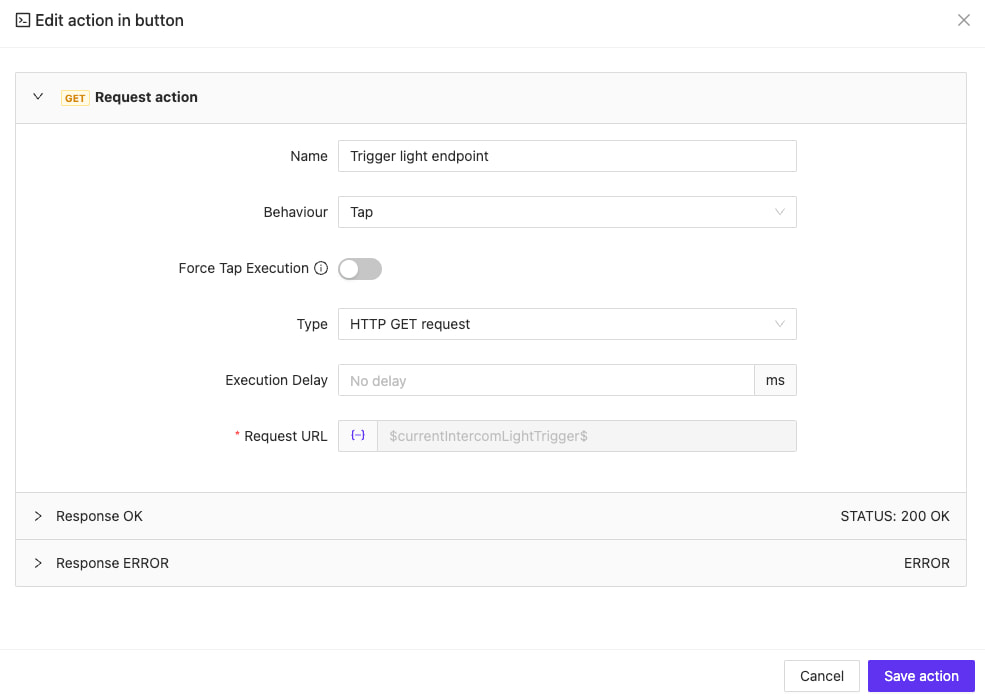
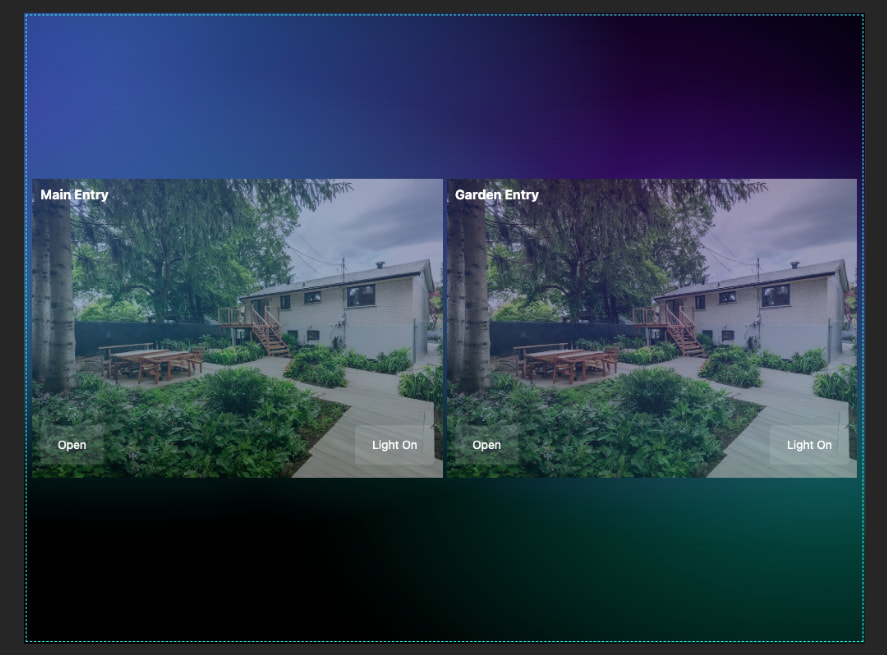
Creating an Intercoms Menu
After creating the individual intercom component, you'll need to implement a menu that displays all your DoorBird devices. This section guides you through creating a dynamic menu using a subpage list component connected to your intercoms dataset.
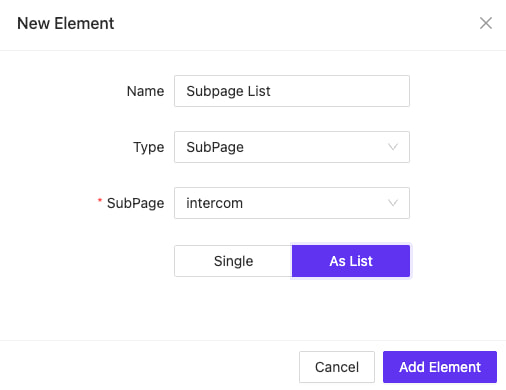
Step 1: Create the Menu Page
- Create a new page in your project to serve as the main intercoms menu
- Add a subpage list component to this page, selecting your "Intercom Menu Entry" subpage as the template
Step 2: Connect the Dataset
- Configure the subpage list to use dynamic data
- Select your intercoms dataset as the data source
- Set the data path to target the
intercomsarray in your dataset
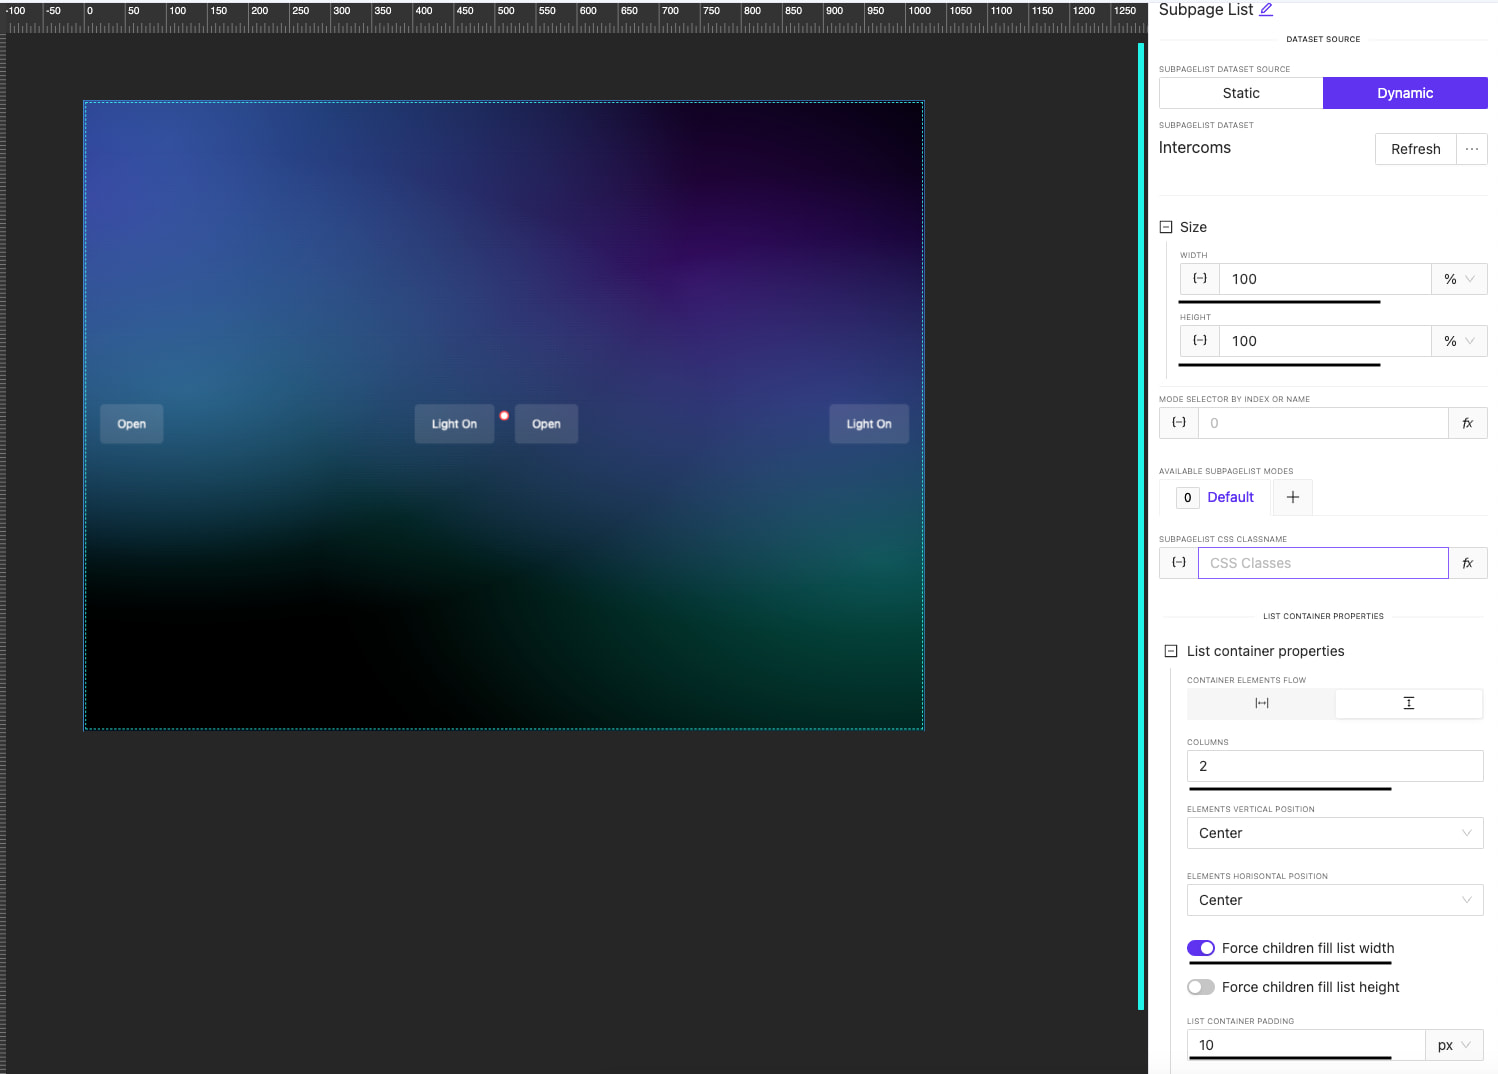
Step 3: Configure List Layout
Apply appropriate styling to optimize the visual presentation of your intercoms:
- Set both width and height to 100% to fill the available space
- Configure the list to display in 2 columns for efficient space utilization
- Enable the "Force children to fill list width" option
- Add 10px padding around items for visual separation
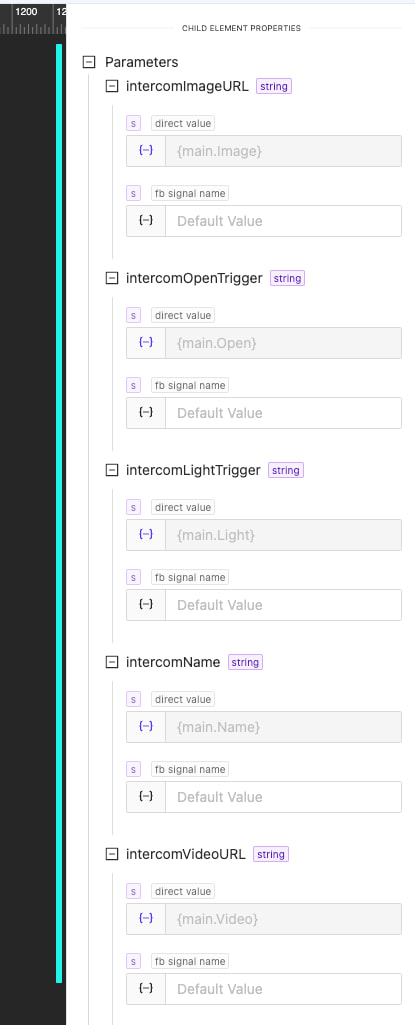
Step 4: Map Dataset Fields to Component Parameters
Connect each field from your dataset to the corresponding parameter in your intercom component:
| Dataset Field | Component Parameter |
|---|---|
| Image | intercomImageURL |
| Open | intercomOpenTrigger |
| Light | intercomLightTrigger |
| Name | intercomName |
| Video | intercomVideoURL |
Complete Implementation
With this configuration complete, your interface now offers two methods of intercom interaction:
- Direct interaction from the menu - users can view still images and control doors/lights directly from each menu tile
- Detailed view interaction - users can tap on an intercom to navigate to the full video feed page
The completed menu provides an intuitive overview of all available intercoms while maintaining direct access to essential controls.