Autonomic Mirage Media Server Integration Guide
Before We Start
This document explains how to add a fully functional Autonomic Media Server player application into your AVStudio project using direct HTTP requests without requiring a control system. You'll learn how to create an interactive media player that communicates directly with the Autonomic Media Server to control music playback throughout your environment.
Understanding Autonomic Media Server Control Protocol and JSON HTTP API
The Autonomic Media Server provides a comprehensive HTTP API that allows direct communication for features like:
- Managing the current playback queue
- Controlling playback (play, pause, skip)
- Adjusting volume
- Browsing music libraries
- Accessing streaming services (Spotify, Tidal, etc.)
- Retrieving album artwork and metadata
Our implementation will utilize the JSON HTTP API, which provides a modern interface for querying and controlling all aspects of the media server.
For comprehensive documentation and the latest API specifications, refer to the official Autonomic developer resources at: https://autonomic.atlassian.net/wiki/spaces/ASKB/pages/1509556225/Autonomic+Media+Server+Control+Protocol#JSON-HTTP-API
Setting Up Global Variables
To build a responsive media player interface, we'll establish global project variables that will store and display the current playback state and track information.
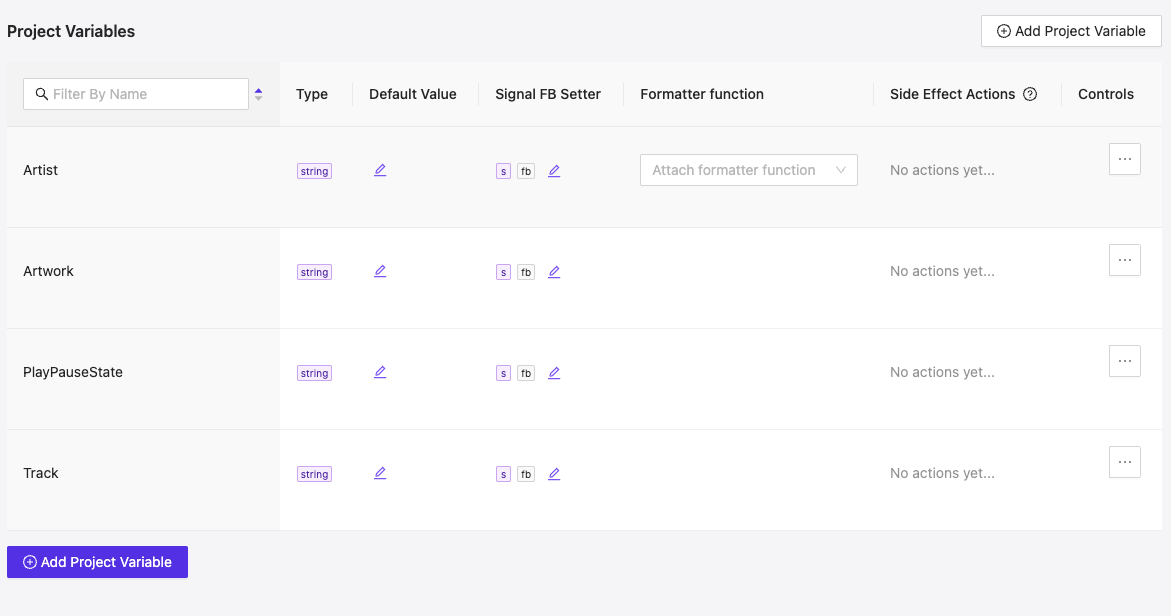
Required Project Variables
Create the following variables in your AVStudio project settings:
-
Artist(string)- Purpose: Stores the name of the currently playing track's artist
- Example value: "The Beatles"
- Usage: Displayed in the media player's artist field
-
Artwork(string)- Purpose: Holds the URL for the current track's album artwork
- Example value: "http://autonomic.local/artwork/12345.jpg"
- Usage: Used as the image source for album artwork display
-
PlayPauseState(string)- Purpose: Contains the current playback state (playing vs. paused)
- Values: "0" for paused, "1" for playing
- Usage: Controls which icon (play or pause) is displayed on the play/pause button
-
Track(string)- Purpose: Contains the title of the currently playing track
- Example value: "Yesterday"
- Usage: Displayed in the media player's track title field
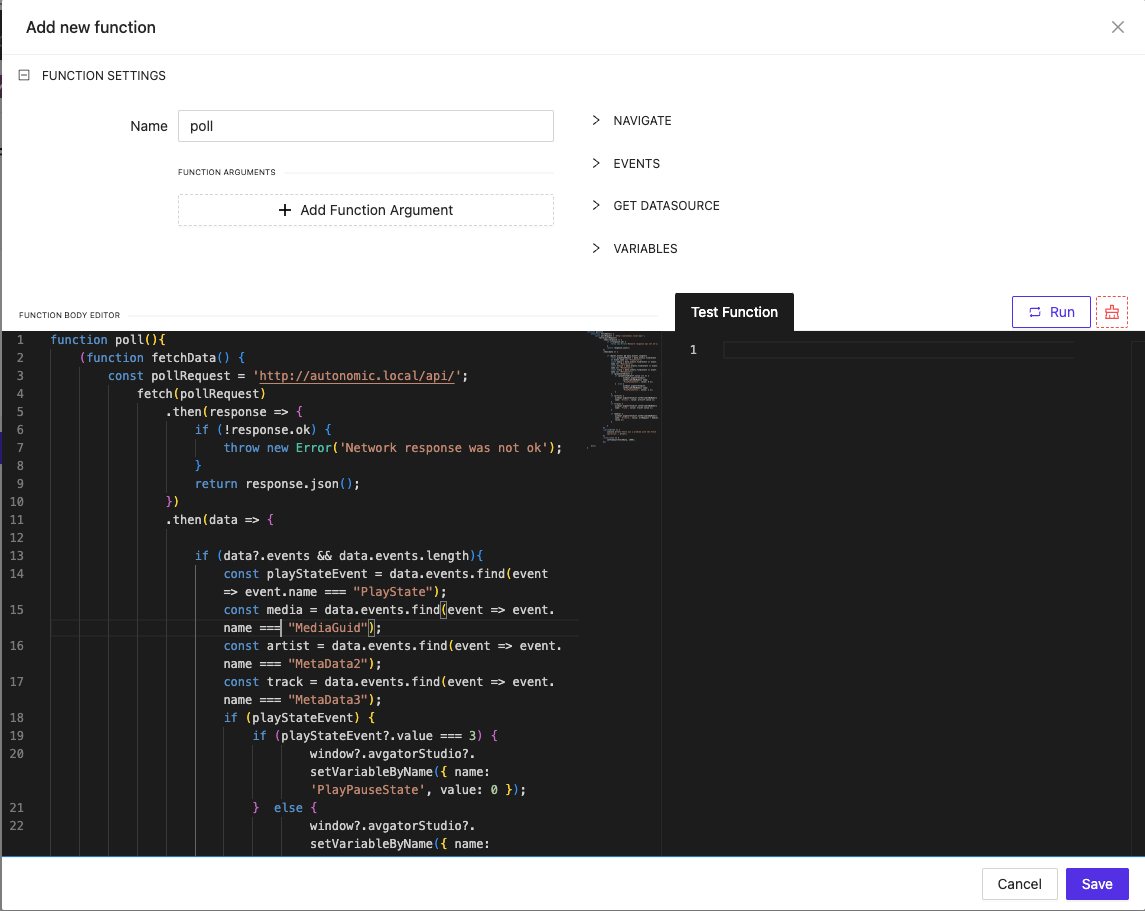
Creating the Polling Function
The following function continuously polls the Autonomic Media Server for playback status and updates our global variables with the current track information. Create this function in AVStudio's Project Functions section:
function poll() {
    // Self-executing recursive function that continues polling
    (function fetchData() {
        const pollRequest = 'http://autonomic.local/api/';
        const artRequest = 'http://autonomic.local/getArt?guid=';

        fetch(pollRequest)
            .then(response => {
                if (!response.ok) {
                    throw new Error('Network response was not ok');
                }
                return response.json();
            })
            .then(data => {
                // Process media server response if events exist
                if (data?.events && data.events.length) {
                    // Extract specific events by name
                    const playStateEvent = data.events.find(event => event.name === "PlayState");
                    const media = data.events.find(event => event.name === "MediaGuid");
                    const artist = data.events.find(event => event.name === "MetaData2");
                    const track = data.events.find(event => event.name === "MetaData3");

                    // Update play/pause state (3 = playing, other values = paused)
                    if (playStateEvent) {
                        if (playStateEvent?.value === 3) {
                            window?.avgatorStudio?.setVariableByName({ name: 'PlayPauseState', value: 0 });
                        } else {
                            window?.avgatorStudio?.setVariableByName({ name: 'PlayPauseState', value: 1 });
                        }
                    }

                    // Update artist information if available
                    if (artist) {
                        window?.avgatorStudio?.setVariableByName({ name: 'Artist', value: artist?.value });
                    }

                    // Update track title information if available
                    if (track) {
                        window?.avgatorStudio?.setVariableByName({ name: 'Track', value: track?.value });
                    }

                    // Update artwork URL if media GUID is available
                    if (media) {
                        window?.avgatorStudio?.setVariableByName({ name: 'Artwork', value: artRequest + media?.value });
                    }
                }
            })
            .catch(error => {
                console.error('There was a problem with the fetch operation:', error);
            })
            .finally(() => {
                // Schedule next poll in 1 second (1000ms)
                setTimeout(fetchData, 1000);
            });
    })();
}
Understanding the Polling Function
This JavaScript function:
- Creates a self-executing recursive function that maintains ongoing communication with the media server
- Sends HTTP GET requests to the Autonomic API endpoint every second
- Processes the returned JSON data to extract current playback information
- Updates the AVStudio global variables with the latest track metadata
- Handles errors gracefully to prevent interface disruption
- Schedules the next polling cycle to ensure continuous updates
The polling approach gives our interface real-time responsiveness to playback changes initiated from any source, whether from our interface or other controllers in the environment.
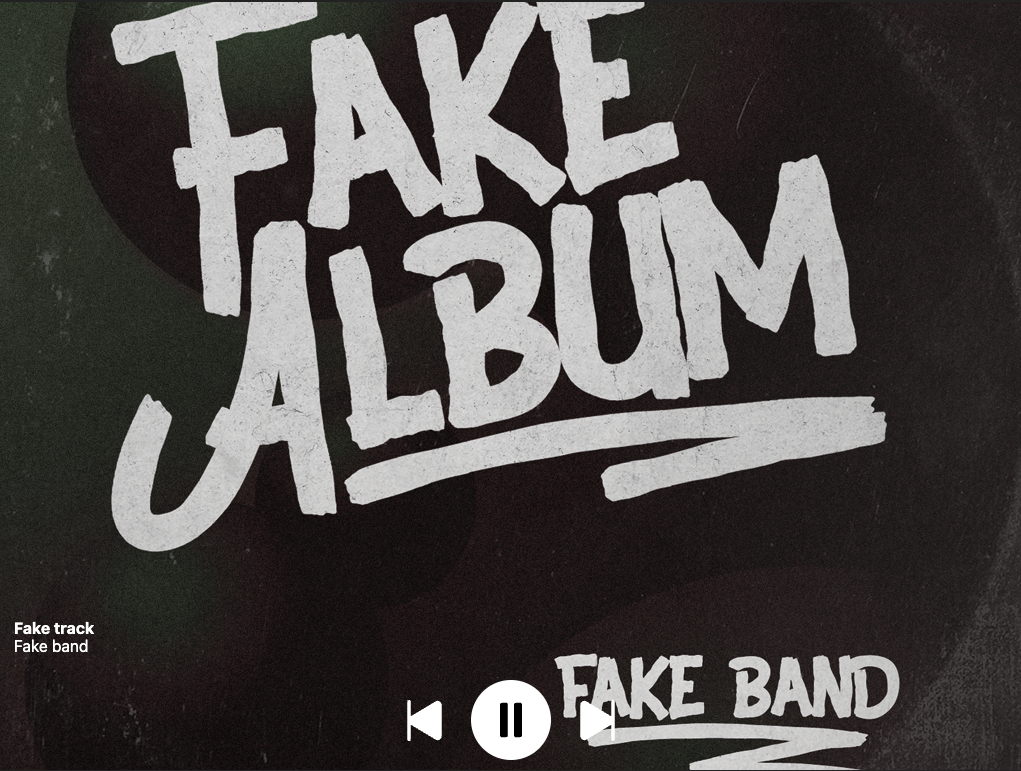
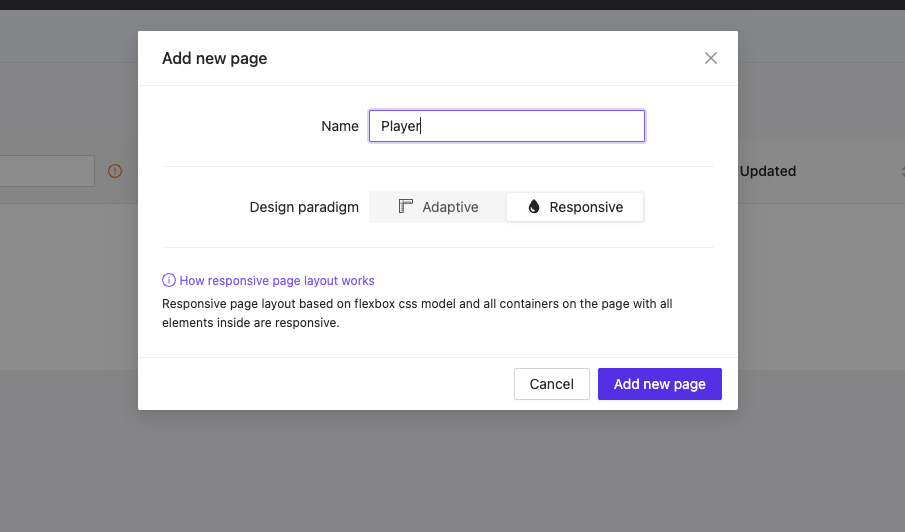
Creating the Player Interface
To build our media player interface, we'll start by creating a new page in the project named "Player." This page will display the currently playing track's information and provide playback controls.
After creating the page, we need to set its background to dynamically show the current track's artwork. Navigate to the page properties and configure the background to use the "Artwork" project variable we created earlier.
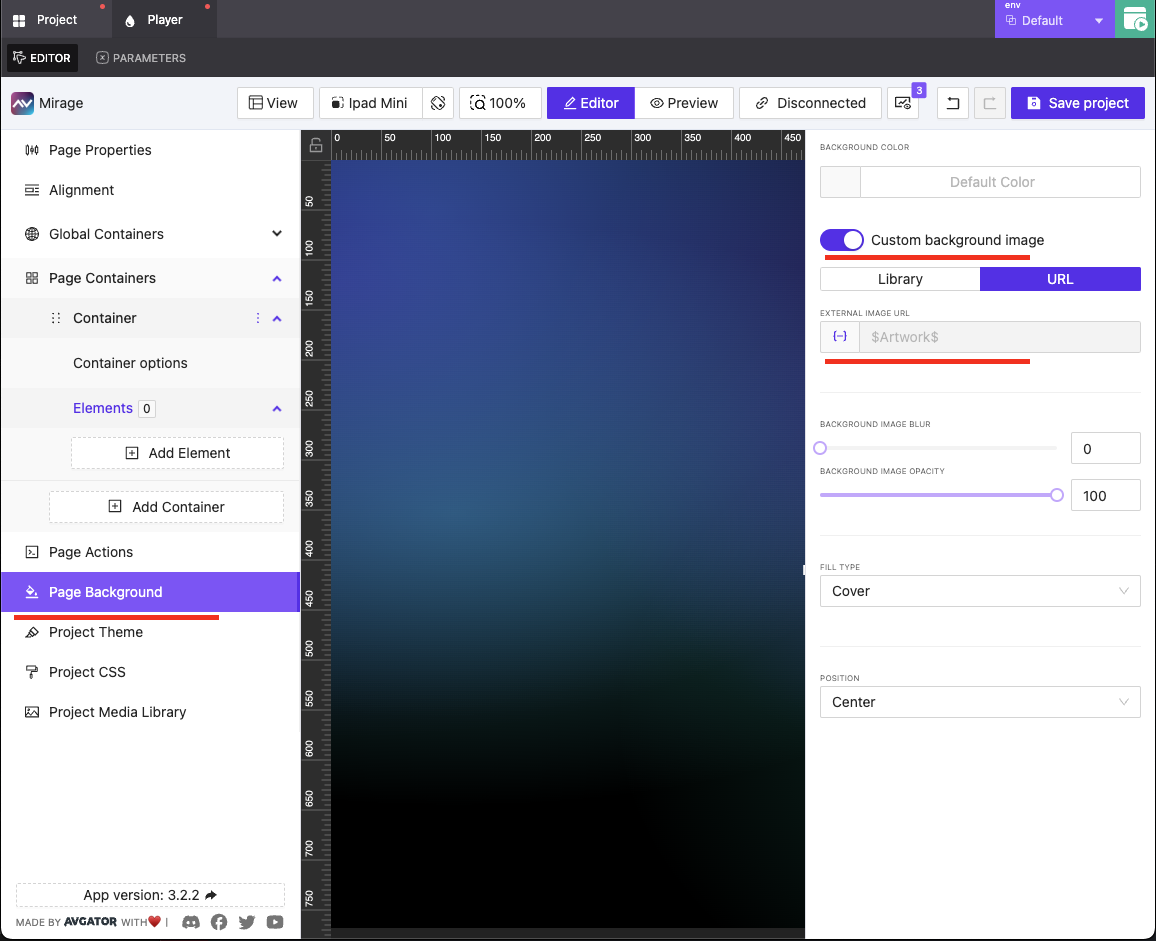
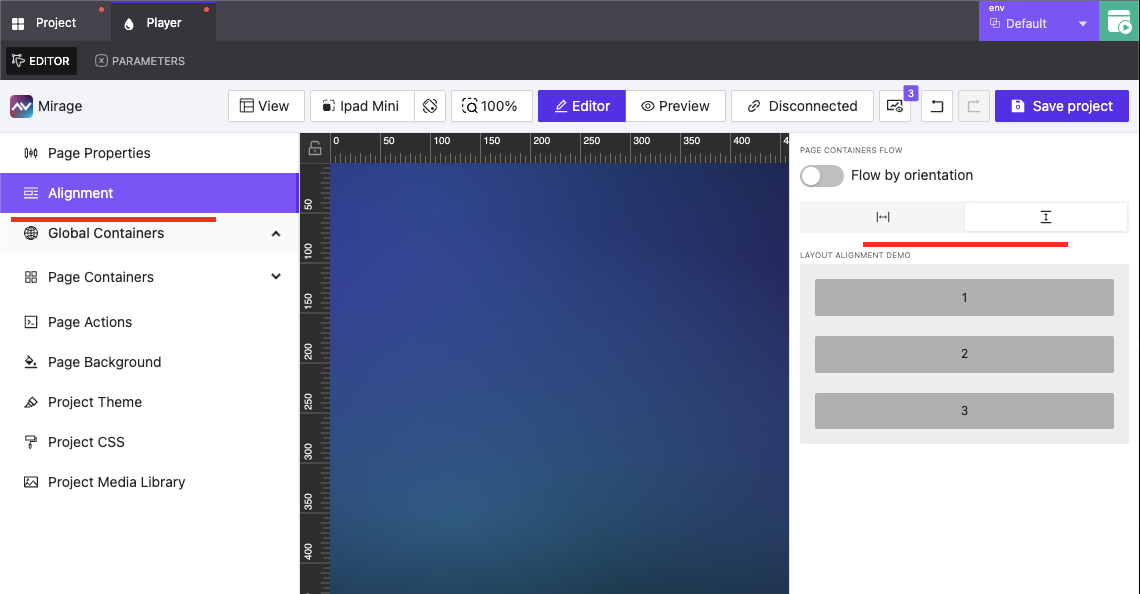
This ensures that the background automatically updates whenever a new song plays. Next, set the page alignment to vertical so our components will stack properly from top to bottom.
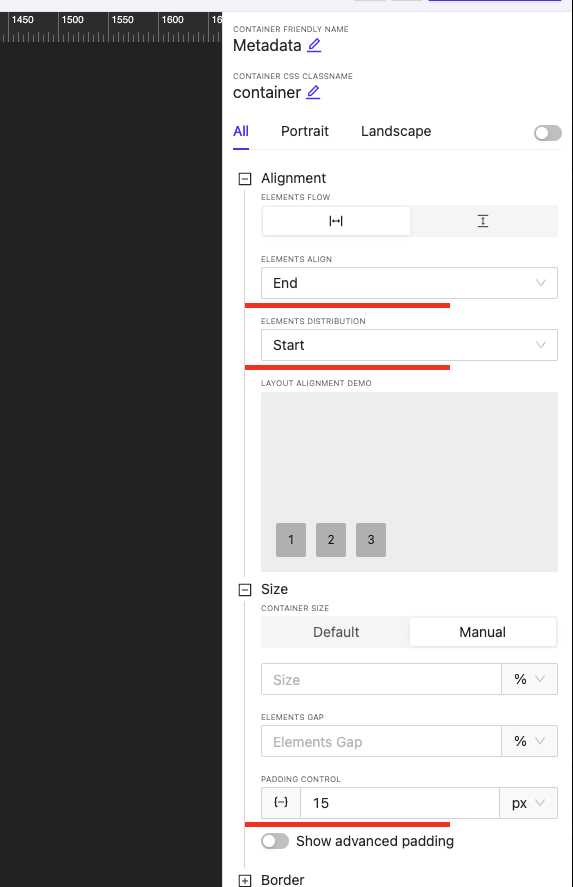
Our player interface will consist of two main sections, so we'll create two containers to organize them. The top container will display track metadata, while the bottom container will hold our playback control buttons. For the top container, configure it with 15px padding on all sides, set elements alignment to "end" (bottom), and elements distribution to "start" (left). This ensures the track information appears at the bottom of the container, aligned to the left.
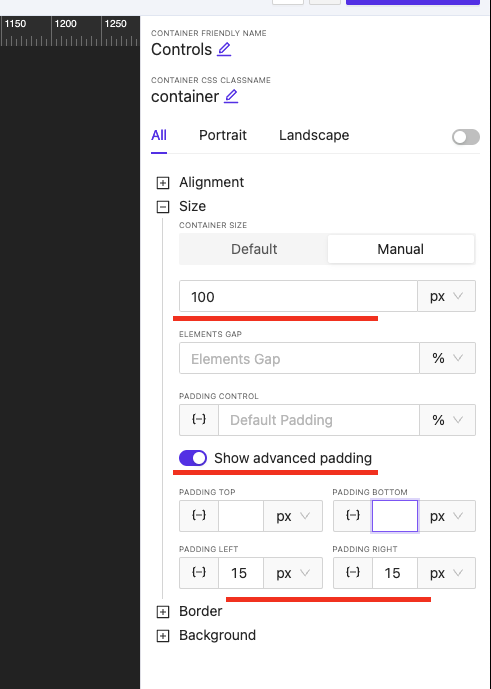
For the bottom container, set its height to 100px with 15px padding on both the left and right sides. This creates a consistent area for our playback controls.
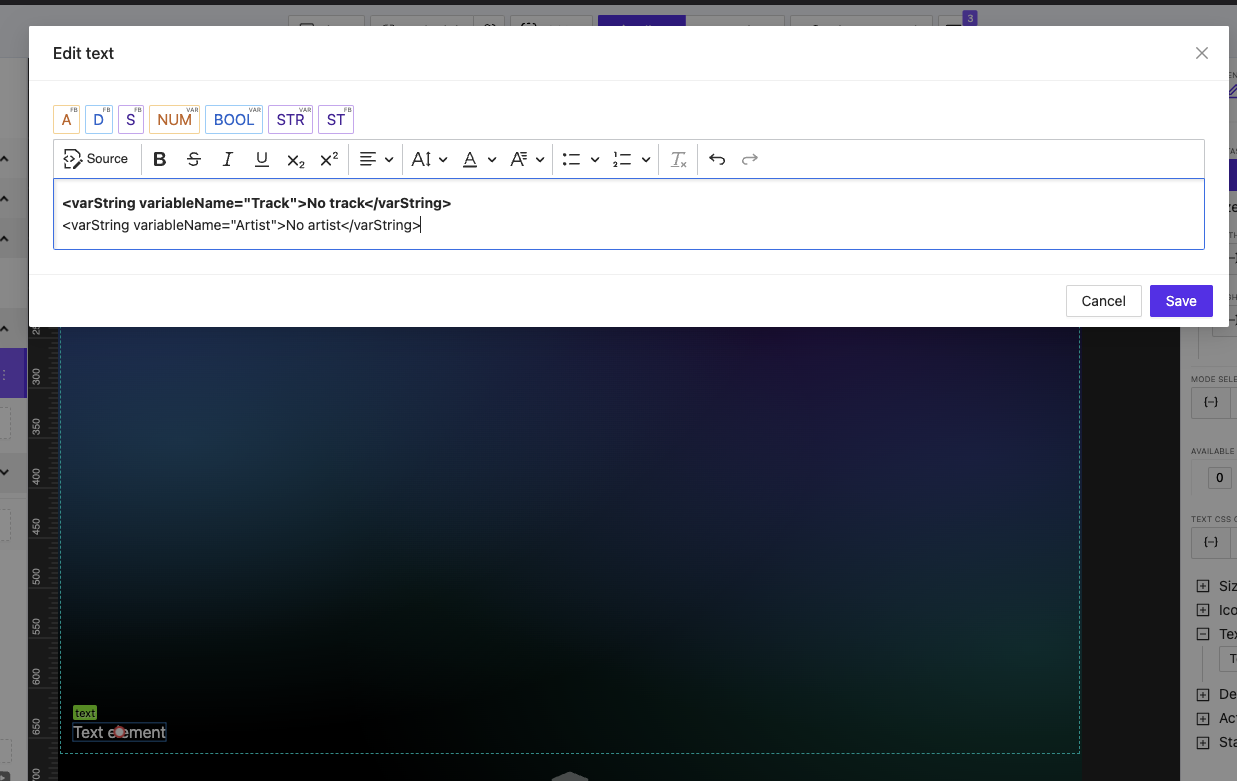
Now let's add the track information to the first container. Insert a text element and configure it to display the current track's name on the first line (bound to the "Track" project variable) and the artist name on the second line (bound to the "Artist" project variable). Style this text appropriately to ensure good visibility against the album artwork background.
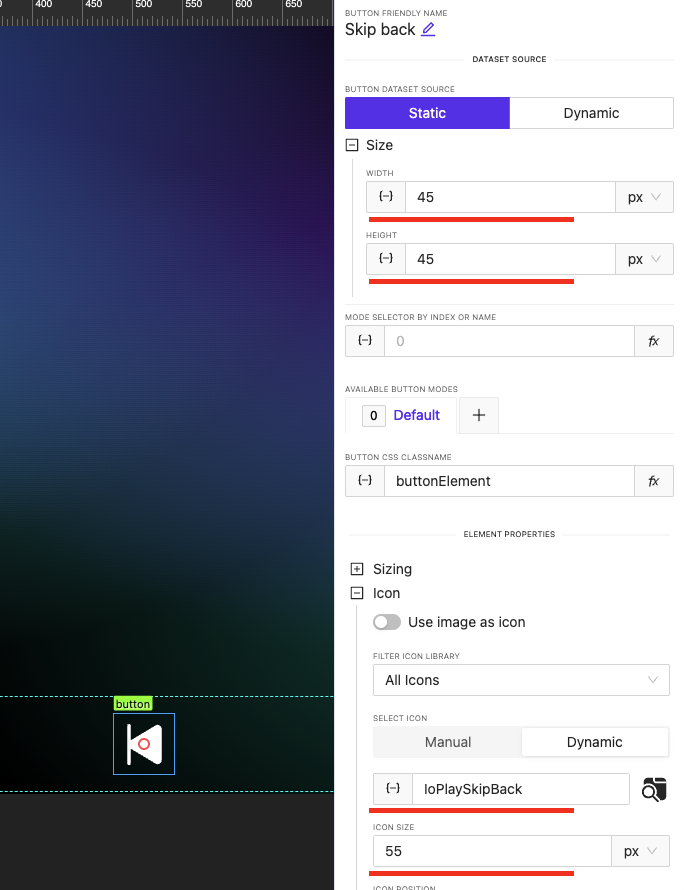
Moving to the bottom container, we'll add three control buttons: skip back, play/pause, and skip forward. Let's begin with the skip back button. Create a button in the second container and set its size to 45 by 45 pixels. Select "IoPlaySkipBack" from AVgator Studio's standard icon library and set the icon size to 55px.
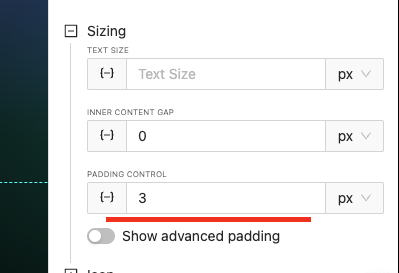
In the Sizing section, change the padding to 3px for better visual balance.
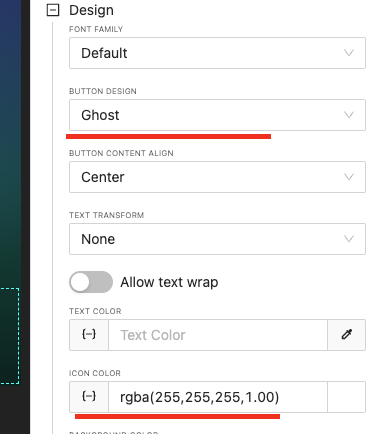
For the button's appearance, set its design to "Ghost" and change the icon color to white so it remains visible against darker backgrounds.
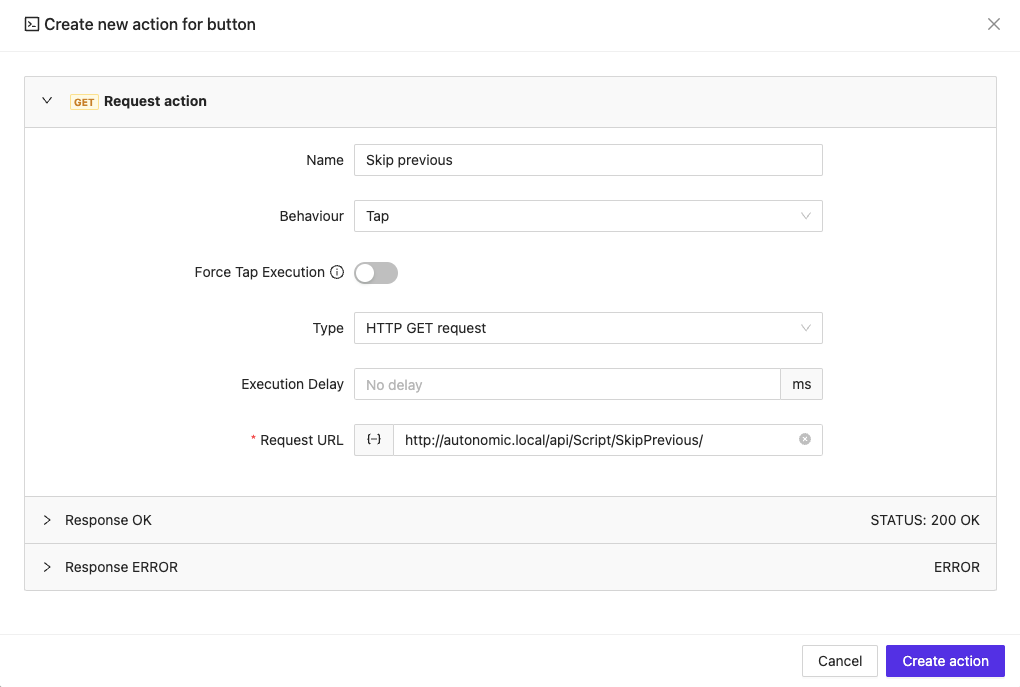
Then add an HTTP GET request action to the button, using "http://autonomic.local/api/Script/SkipPrevious/" as the Request URL according to the Autonomic Media Server Control Protocol.
Next, clone this button and modify it to create the skip forward button. Change its icon to "IoPlaySkipForward" and update the action URL to "http://autonomic.local/api/Script/SkipNext/" to control forward track navigation.
Between these two buttons, we'll create the play/pause button. This button needs to be more prominent, so set its size to 80 by 80 pixels with the "IoPause" icon at 50px size. Like the other buttons, set its padding to 3px.
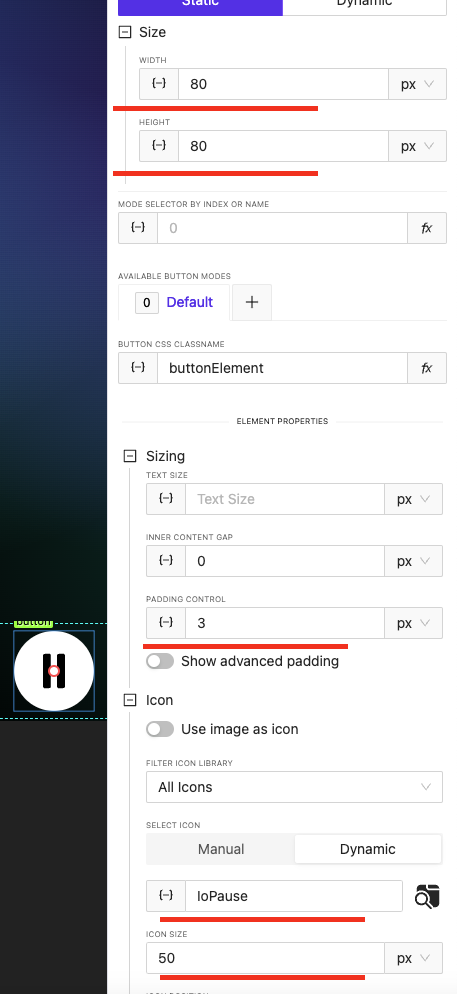
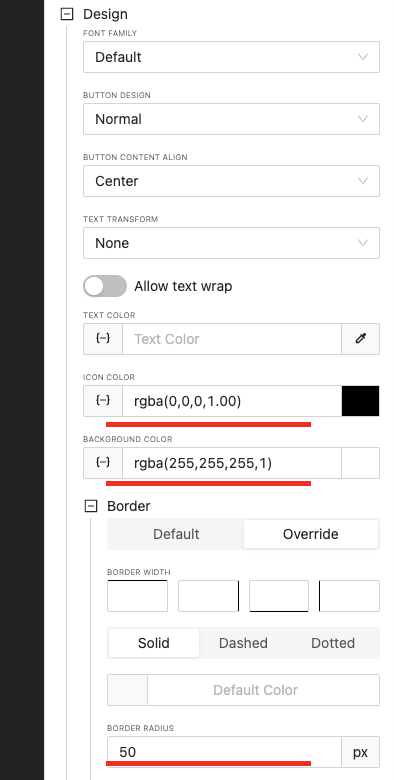
For its design, configure a white background with black icon color and a 50px border radius to create a perfect circle.
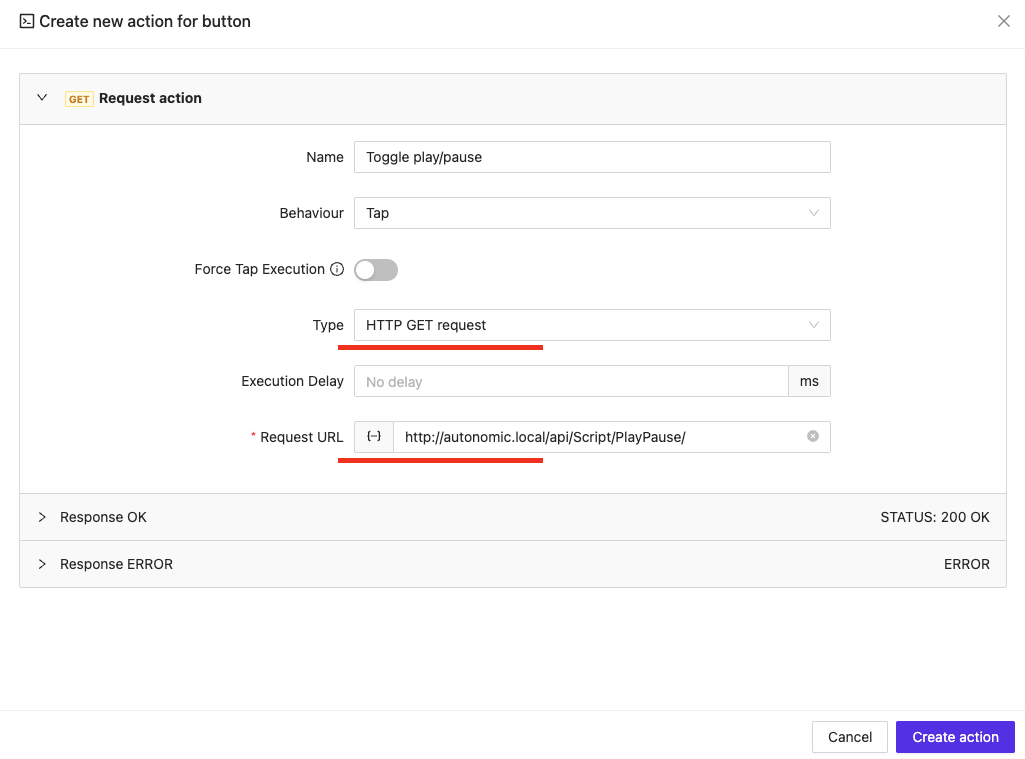
Add an HTTP GET action to this button using "http://autonomic.local/api/Script/PlayPause/" as the Request URL.
Since this button needs to toggle between play and pause states, we'll add a second mode to represent the paused state.
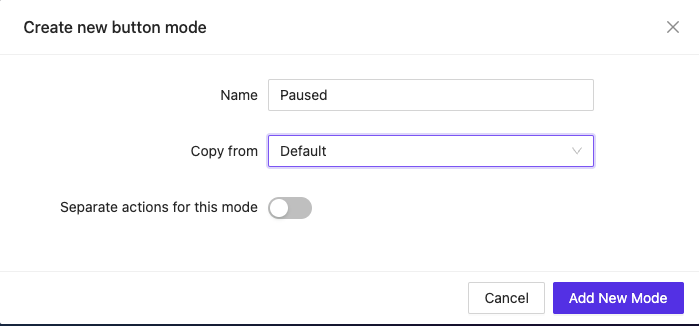
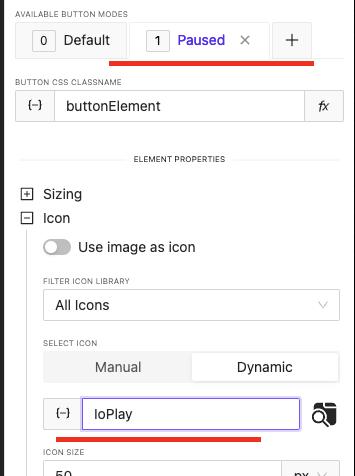
Create a new mode, select it, and change its icon to "IoPlay."
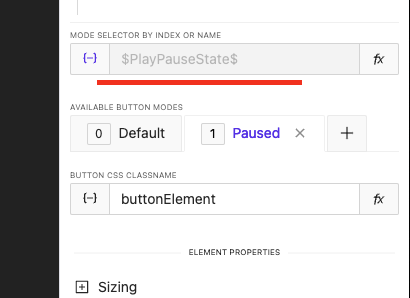
Then set the "PlayPauseState" project variable as the mode selector for this button, allowing it to automatically switch between play and pause icons based on the current playback state.
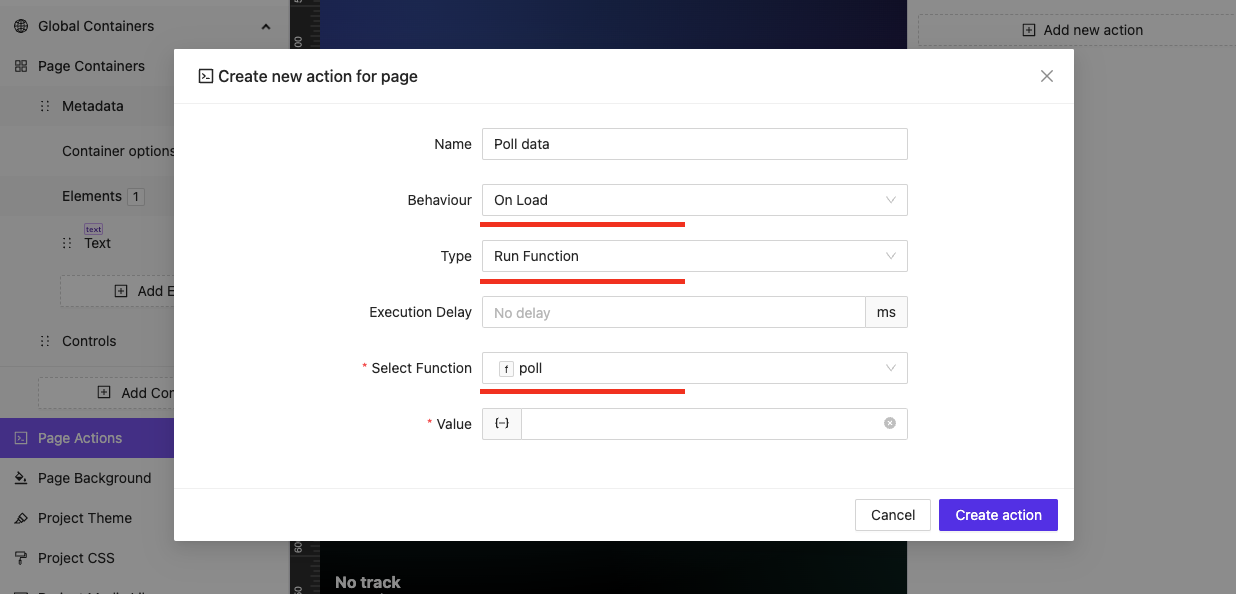
The final step is to ensure our player stays updated with the current playback information. Open the Page Actions section and add a new action with "On Load" behavior. Select "Run function" as the action type and choose the "poll" function we created earlier. This ensures that as soon as the player page loads, it begins polling the Autonomic Media Server for playback status updates.
With all these components in place and properly configured, our media player is complete. When the page loads and the polling function runs, your interface will display the current track's information and provide intuitive controls for media playback.