Setting Up Project Settings
After creating your project, the next step is to configure the settings that define how it behaves, builds, and connects. This guide walks you through how to open the project settings panel and configure key fields like environment setup, debug mode, signal IDs, connectors, and dataset access.
1. Open the Project Dashboard
You can access the dashboard in two ways:
a. In the My Projects panel, click the name of the project you want to configure
b. Or, from the preview card, click the Edit button next to the project
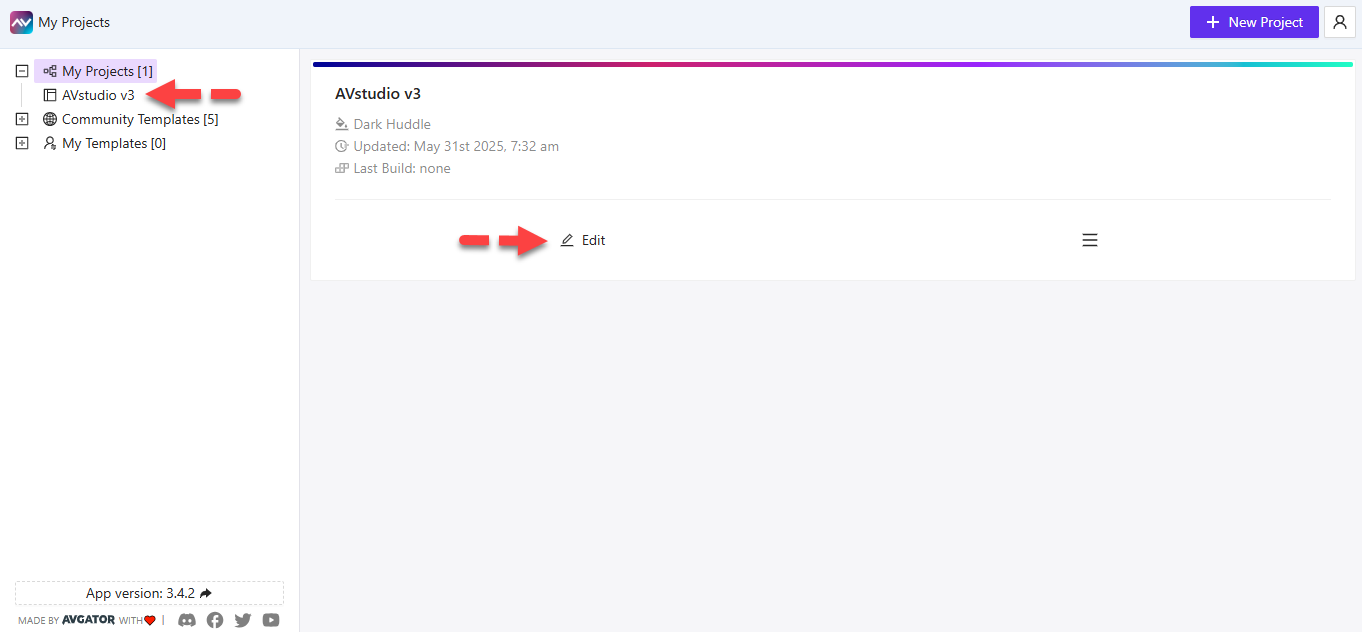
Both actions will take you to the Project Dashboard.
2. Access the Project Settings Panel
a. In the dashboard, click the Settings button (three-line icon)
b. Select Project Settings from the dropdown menu

This will open the full Project Settings panel.
3. Configure General Project Information
Update the following fields:
a. Project Name: Set a clear and recognizable name. Example: Smart Home UI - Beta
b. Project Theme: Select a theme from the dropdown. Example: Dark Huddle, Light Minimal
c. Splash screen Logo image ID: Paste the image ID from your media library. Example: logo_78e1
d. Splash screen Text: Enter a welcome message. Example: Welcome to LuxeControl
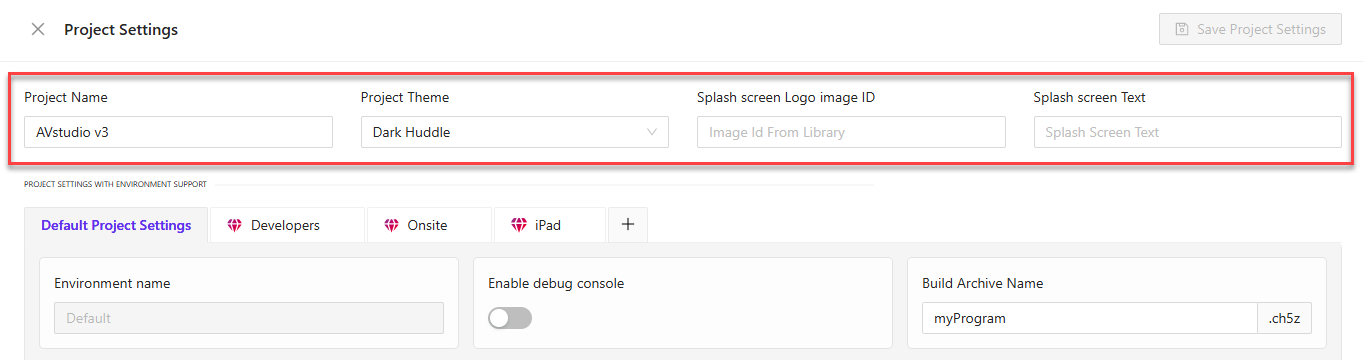
These fields affect branding and the visual appearance during loading screens.
4. Set Up Environments
To define multiple deployment environments (such as development, onsite, iPad view):
a. Click the + button to create a new environment tab
b. In the Environment name field, enter a label (e.g., QA, Tablet, or Internal)
c. Toggle Enable debug console if needed for testing
d. Set the Build Archive Name — this defines the filename for exported builds. Example: myApp_test_build

Use environments to separate internal testing setups from production builds.
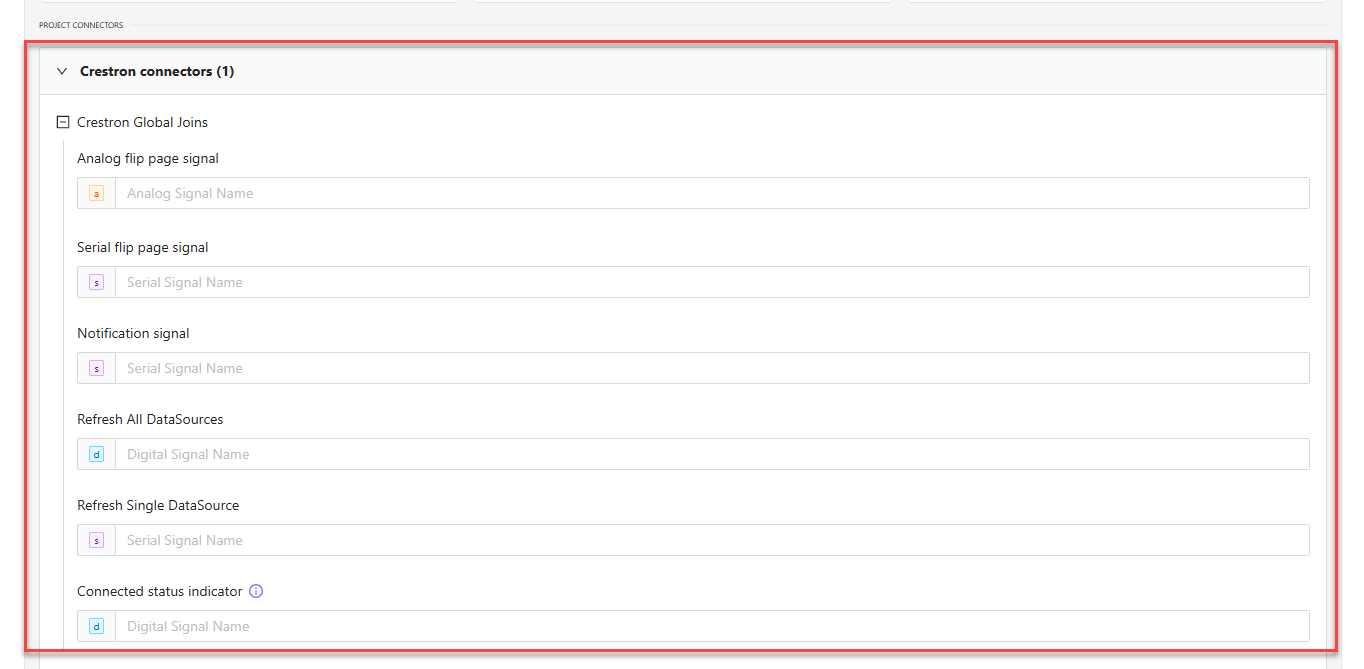
5. Configure Crestron Connectors
If your project integrates with Crestron systems or similar controllers, you can assign signal IDs that allow AVstudio to interact with external commands, navigate between pages, and trigger data updates.
a. Analog flip page signal – Accepts a numeric input to switch between different pages.
Use this when your control processor sends analog values representing specific page indexes.
Example: analog_01
b. Serial flip page signal – Accepts string values that represent page names or routes.
Use this when your control system uses serial strings (e.g. "home", "settings") to flip pages.
Example: serial_page_name
c. Notification signal – Displays real-time alerts or status messages in the UI.
Bind this to a serial signal that provides messages from your control system, like "Network Error" or "System Ready".
Example: serial_alert_msg
d. Refresh All DataSources – Triggers a manual refresh for all bound data sources.
Connect this to a digital signal that forces a full data reload when toggled ON (value 1).
Example: digital_refresh
e. Connected status indicator – Indicates whether the system is connected or offline.
Use this digital signal to show an online/offline status icon in your interface.
Example: digital_online_state
6. Add Web Connectors
If your project needs to communicate with a web API or external data service, you can add a web connector. These are typically used for retrieving dynamic content, triggering API requests, or syncing with third-party systems like building management tools, calendar services, or dashboards.
a. Scroll to the WEB connectors section in the Project Settings panel.
b. Click the Add Web Connector button to begin creating a new integration.
c. In the connector setup modal (not shown here), enter configuration details such as endpoint URL, request type (e.g. GET or POST), and headers or payloads if required.
Example: You could connect to https://api.weather.com/current?location=XYZ to pull in real-time temperature data for a dashboard display.
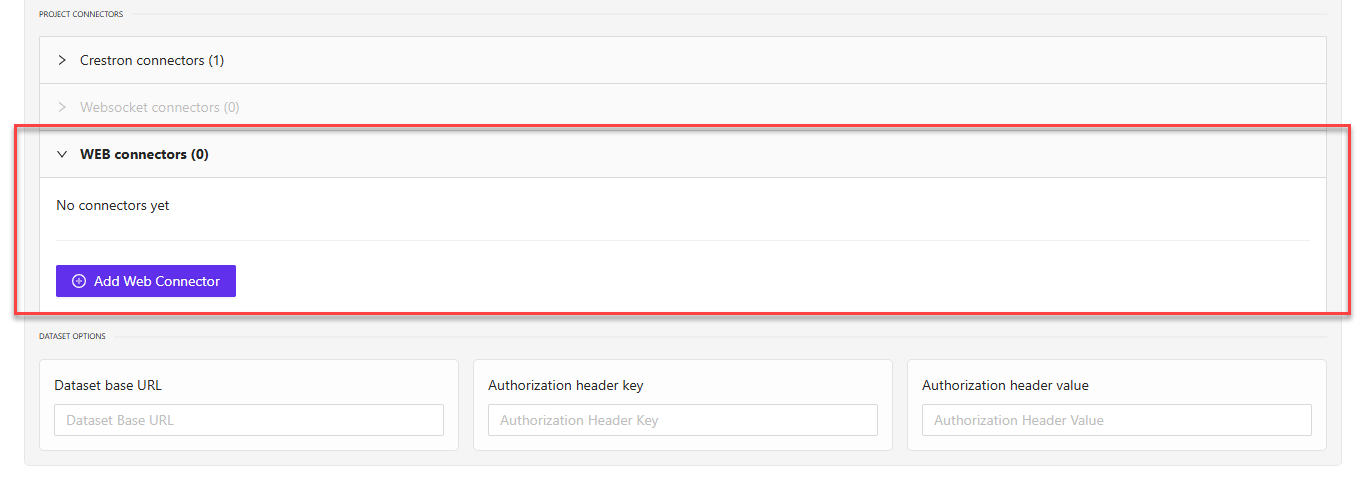
Web connectors allow your AVstudio project to talk to third-party platforms—ideal for syncing data, controlling devices, or showing external content in real time.
7. Define Dataset Options
Dataset options allow AVstudio to connect securely to external datasets that power dynamic content in your interface. These settings are especially useful when using APIs that require authentication or custom headers.
a. In the Dataset base URL field, enter the base address of the API or database.
Example: https://api.smartbuilding.io/v1 — this might be the root of a facilities management system or custom backend.
b. In the Authorization header key, enter the name of the HTTP header used for access tokens or API keys.
Example: Authorization or x-api-key depending on the service.
c. In the Authorization header value, paste the actual token or key value used to authenticate requests.
Example: Bearer eyJhbGciOiJIUzI1NiIsInR5... — this would be issued by your backend or identity provider.

8. Save Your Changes
Always remember to save your work after editing project settings. If you leave the page without saving, your configuration changes will be lost.
a. Click the Save Project Settings button in the top-right corner of the settings panel.
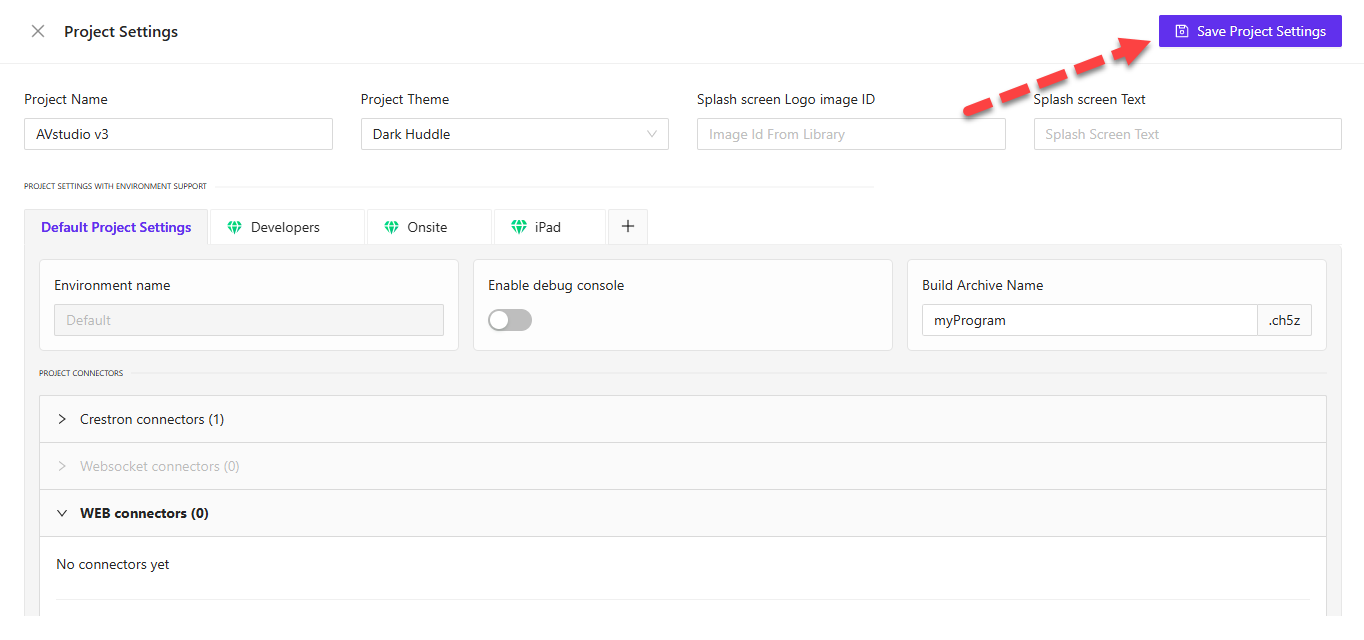
This saves all updates made across general settings, environments, connectors, and dataset fields.
Summary
This guide covered how to:
- Open the project dashboard
- Access the settings panel
- Edit branding and splash screen details
- Set up environments with debug options
- Configure Crestron signal connections
- Add web API integrations
- Define dataset access and authentication
- Save your updates properly
Use this structured approach to make sure every AVstudio project is properly set up for success.