Data Sources Overview
The Data Sources section in AVstudio allows you to connect your project to external APIs, WebSocket streams, or local mock data. These sources can be used to feed dynamic content into your pages and components. With support for data transformation, image preloading, and flexible HTTP or WebSocket configurations, data sources make it easy to integrate real-time and remote data into your AVstudio workflows.
Accessing the Data Sources Section
The Data Sources section lets you connect your AVstudio project to external APIs, WebSocket streams, or local mock data. These sources are used to populate your components with dynamic content.
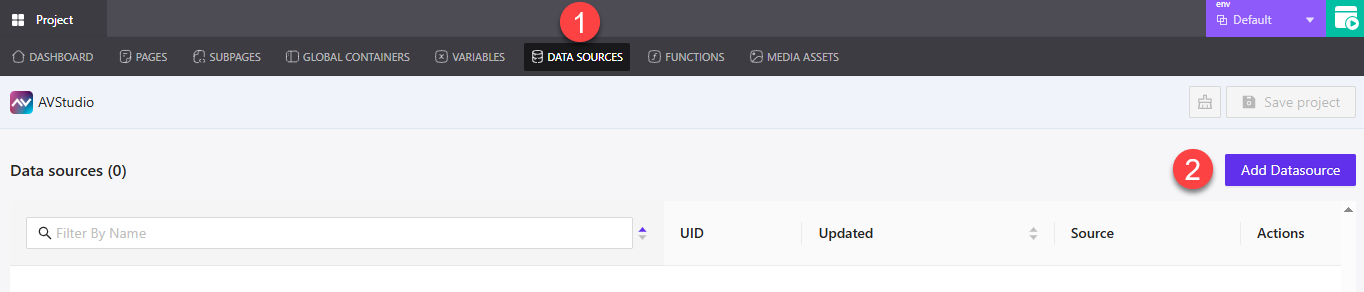
① Data Sources Tab – Located in the project’s top navigation bar. Clicking this opens the Data Sources dashboard.
② Add Datasource – Click this button to open the configuration window for a new data source.
Creating a New Data Source
Clicking Add Datasource opens the configuration panel where you can define how the data should be fetched and used.
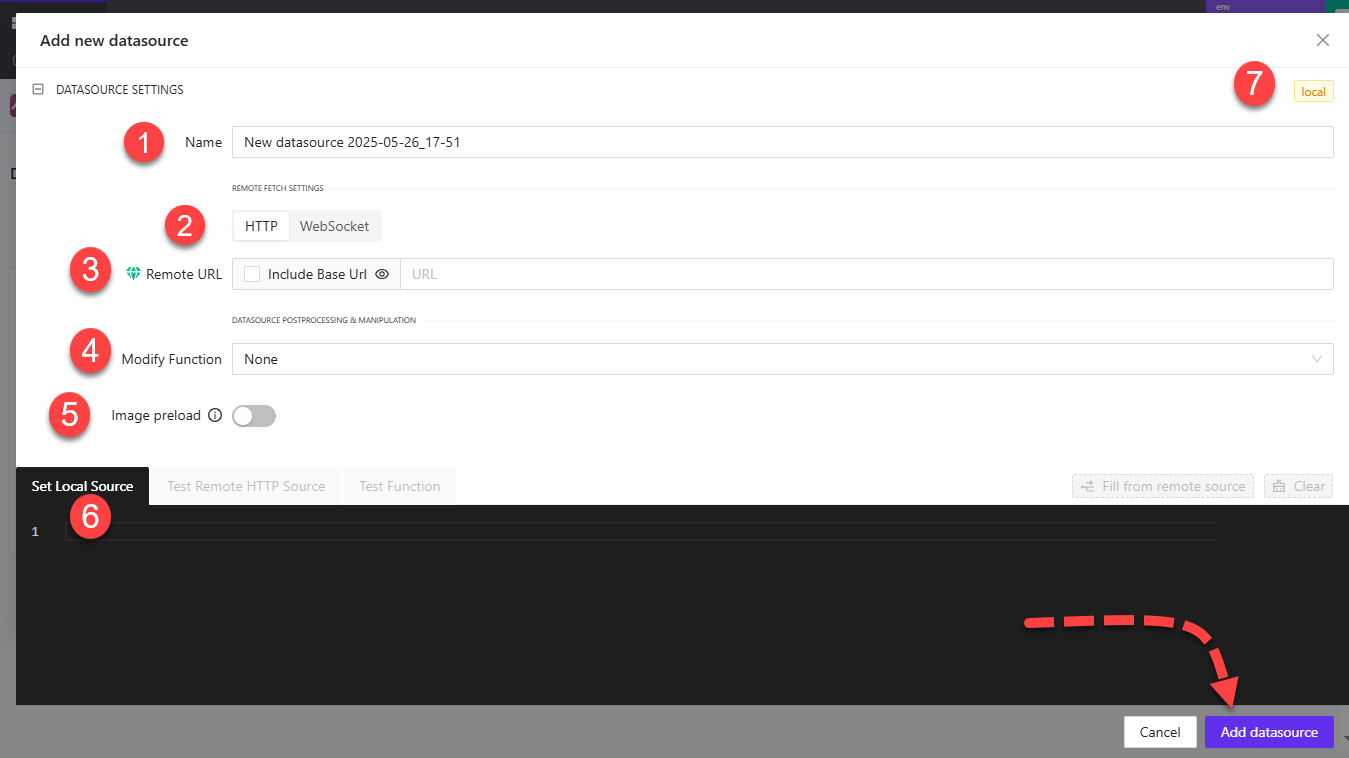
① Name – Assign a unique name to your data source. A default timestamped name is generated, but it can be edited.
② Remote Fetch Settings – Choose the data fetching method:
HTTP– Requires a URL for remote data fetching.WebSocket– Allows real-time updates via a WebSocket connector.
③ Remote URL or WebSocket Connector – Depending on the fetch type, enter either:
- An HTTP endpoint (with optional base URL inclusion)
- A WebSocket connector
④ Modify Function – Optional. Select a post-processing function that will manipulate the incoming data before it’s used.
⑤ Image Preload – Toggle this on to preload and cache images from any URLs present in the response.
⑥ Set Local Source – Use this terminal-like editor to define mock/local data manually. This is useful for development and testing.
⑦ Toggle Local View – Clicking the local label at the top collapses the remote settings and expands the Set Local Source view for easier local editing.
At the bottom, use Add datasource to save, or click Cancel to close without saving.
Data Sources Dashboard Overview
Once data sources are created, they appear in the Data Sources dashboard. This table view allows you to monitor, edit, and manage your configured sources.
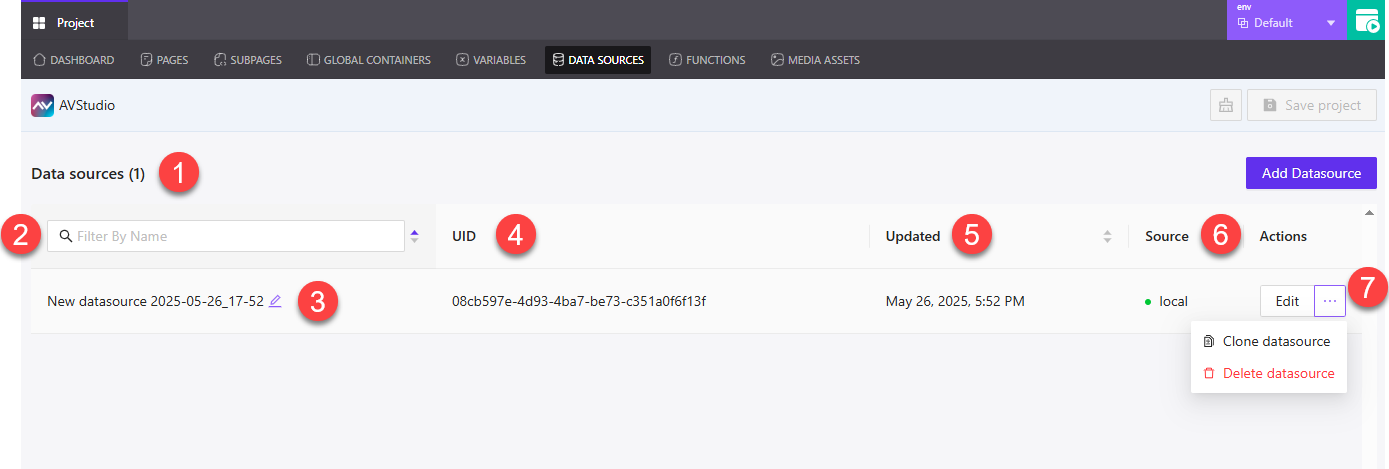
① Data Sources Header – Displays the current number of data sources defined in the project.
② Filter By Name – Lets you search through your data sources quickly by name — especially helpful when working with multiple entries.
③ Editable Name Field – Click the pencil icon to rename the data source inline.
④ UID – Each data source is assigned a unique identifier, useful for referencing in logic or debugging.
⑤ Updated – Shows the last saved date and time of the data source, so you can track when it was last changed.
⑥ Source – Indicates whether the data source is using a local source or pulling from a remote HTTP or WebSocket endpoint.
⑦ Actions Menu
Edit– Opens the full data source editor for updates.Clone datasource– Creates a duplicate of the current data source.Delete datasource– Permanently removes the data source from the project.