Pages Overview
The Pages section in AVstudio is where you manage the main views of your project. From selecting layout paradigms to configuring signal-based navigation, this interface helps you create, edit, and organize the pages that structure your application.
Navigating to the Pages Section
The Pages section is where you can view and manage all the main pages in your project. This interface introduces the structure used for creating and configuring pages and shows the two layout paradigms available.
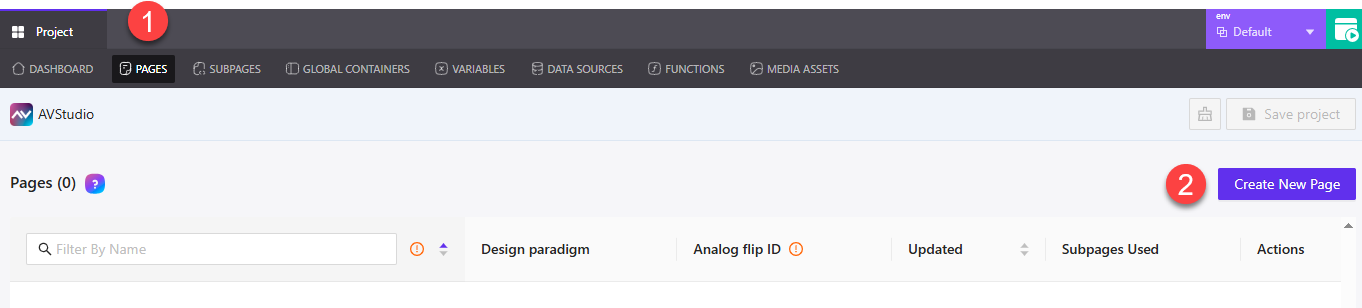
① Pages Tab – Located at the top navigation bar within a project, this tab opens the Pages section, where all your project’s pages are listed and managed.
② Create New Page – Opens a dialog for creating a new page. While the button appears on the top right of the Pages panel, clicking it introduces a few key interface elements described below.
When the user clicks Create New Page, a dialog opens allowing them to name the page and select a design paradigm. There are two layout options available, each with a short description directly visible in the interface.
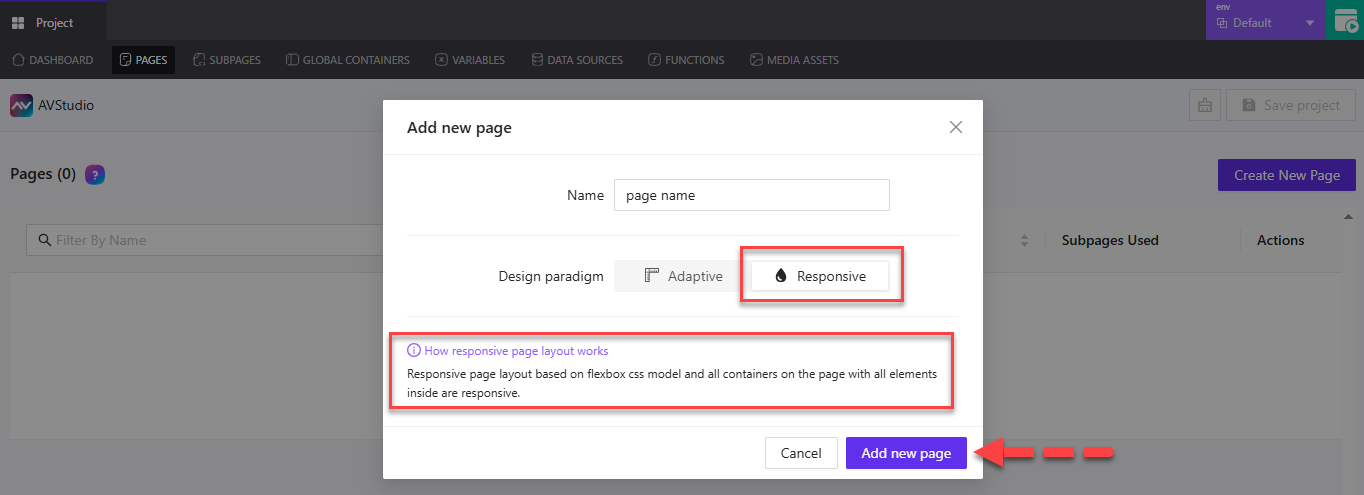
Responsive Design Paradigm
- Based on the Flexbox CSS model, this layout automatically adapts to screen sizes.
- All containers and their child elements will respond to different device widths.
- This option is selected when you want pages that resize and reposition content fluidly.
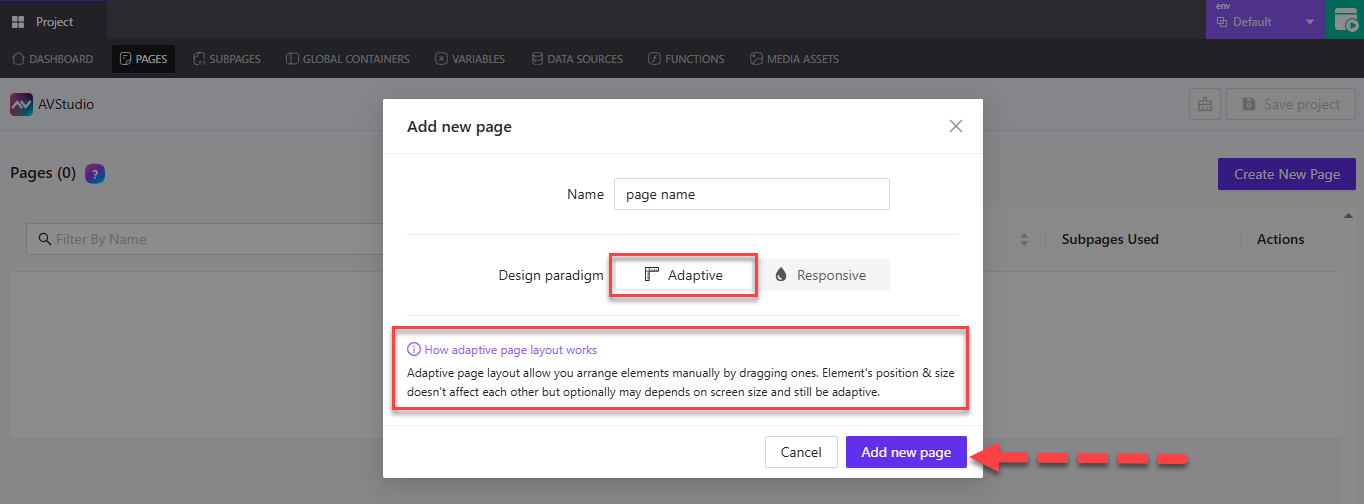
Adaptive Design Paradigm
- Lets you manually arrange elements within the page.
- Each element retains its position regardless of others, offering precise layout control.
- Optionally, elements may still respond to screen size, but without Flexbox behavior.
After choosing a design paradigm and naming the page, the user can click Add new page to complete the process.
💡 Note: The Cancel button is also available if the user decides not to proceed with creating a new page.
Pages Dashboard Overview
Once pages are created, they appear in the Pages dashboard. This view helps you track and manage your project's pages at a glance — including layout type, signal settings, last update, and available actions.
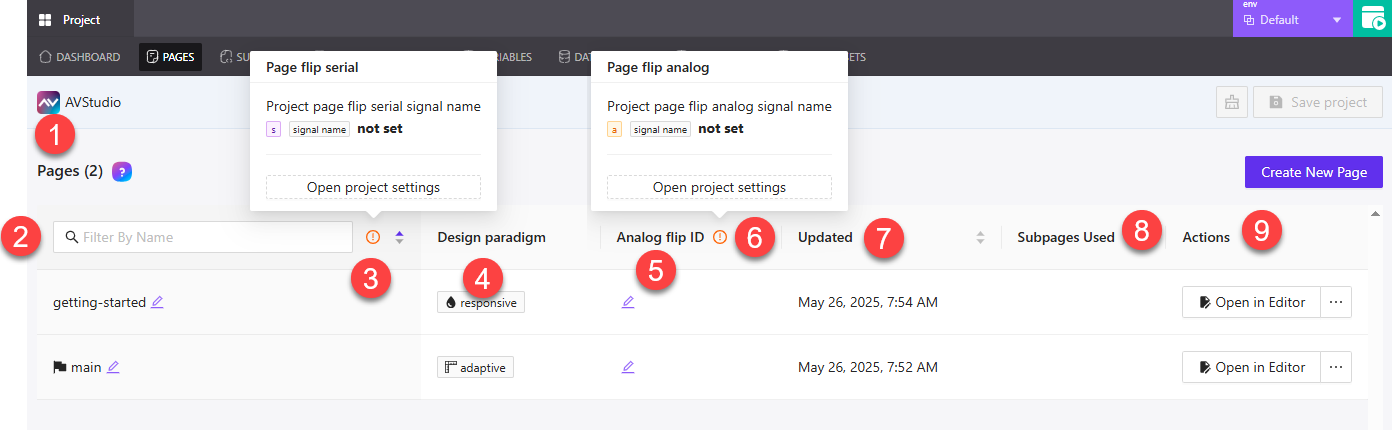
① Pages Header – Displays the total number of pages currently in the project (e.g., Pages (2)). The ? icon opens a contextual help guide for this section.
② Filter By Name – Allows you to search for pages by name. This is useful when working with larger projects containing multiple pages.
③ Page Flip Serial Info Icon – When clicked, shows the current serial signal name used for project-wide page flipping. The tooltip shows whether it's set or not and includes a shortcut to Project Settings.
④ Design Paradigm – Indicates whether each page is using a Responsive or Adaptive layout, based on what was selected during page creation.
⑤ Analog Flip ID – Editable field for assigning an analog signal that controls page flipping behavior for the specific page.
⑥ Page Flip Analog Info Icon – Clicking this icon reveals a tooltip for the analog signal name used in the project. It shows whether it’s set and provides a link to open Project Settings.
⑦ Updated – Shows the most recent date and time the page was modified.
⑧ Subpages Used – Indicates how many subpages are associated with the page.
⑨ Actions – This column includes the Open in Editor button to access the page builder and a menu with additional actions
Managing Pages in the List
Each page listed in the Pages dashboard comes with direct controls for editing its name, adjusting signal IDs, opening the editor, and accessing additional actions.
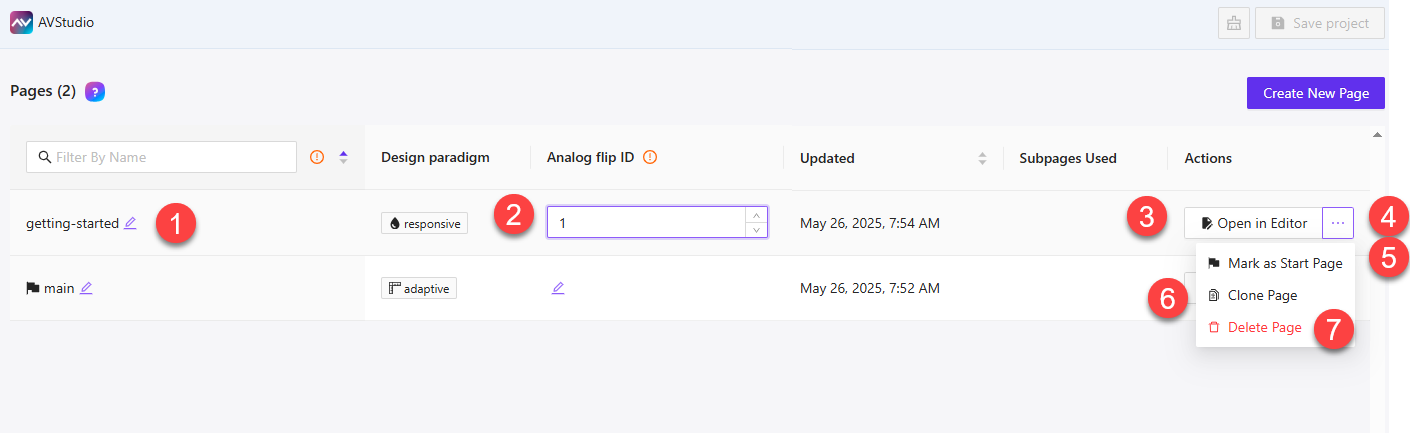
① Page Name (Editable) – Displays the current page name. Clicking the pencil icon turns the name into an editable field. You can rename the page directly from the list view.
② Analog Flip ID – A numeric input field used to assign an analog signal ID for page flipping. You can increment or decrement the value using the small arrow controls next to the field.
③ Open in Editor – Opens the selected page in the AVstudio page editor, allowing you to work on layout, components, and interactions.
④ Actions Menu (Three Dots) – Opens a dropdown menu with more actions available for the selected page.
⑤ Mark as Start Page – Sets the current page as the starting (or home) page of your project. Only one page can be designated as the start page at a time.
⑥ Clone Page – Creates a copy of the selected page. The default name format for the cloned version is the original name followed by _clone (e.g., getting-started_clone). The name can be edited after creation.
⑦ Delete Page – Removes the page from your project. Use this action to clean up unused or outdated pages.
Project Save & Revert Options
When working in the Pages section, two controls appear in the top-right corner whenever changes are made.
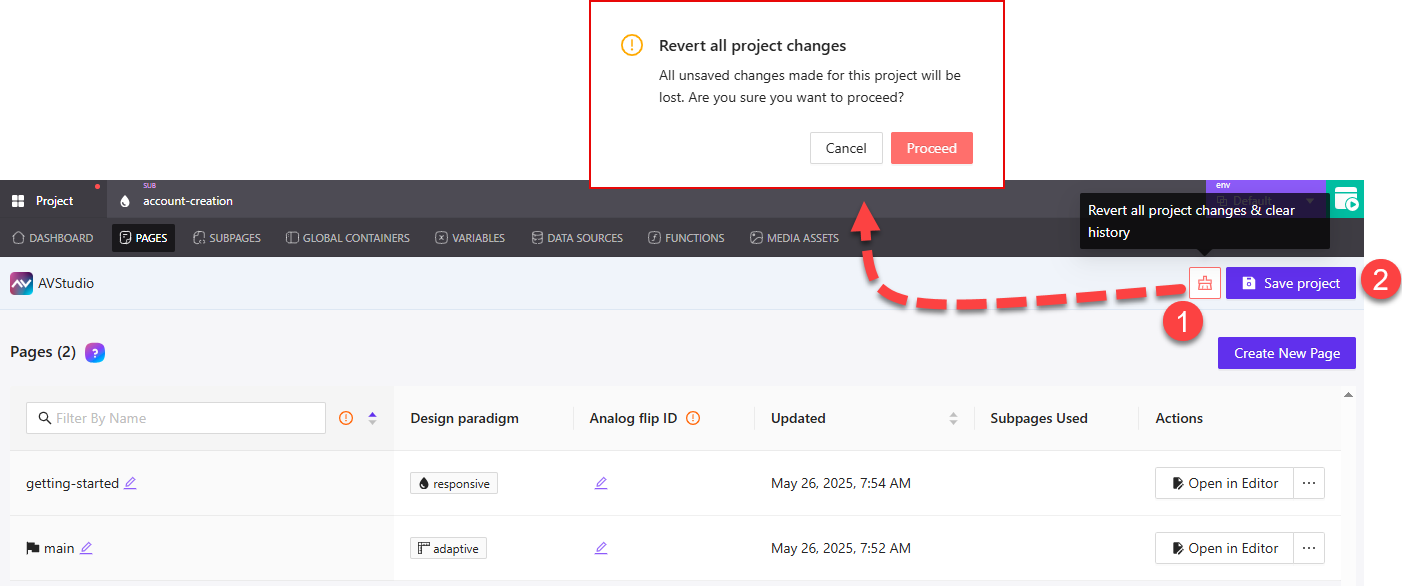
① Revert Project Changes – Clicking the broom icon opens the Revert all project changes confirmation dialog. This will discard all unsaved changes and reset the project state. You’ll have the option to Cancel or Proceed to confirm the reset.
② Save Project – Click the Save Project button to save all pending changes. The button is only active when there are changes to save.
These controls appear only when edits are made, and give you a quick way to either commit or discard your updates.