Project Settings Overview
The Project Settings panel is where you configure key properties of your AVstudio project — from the project name and theme to environment-specific build settings and connector integrations.
General Project Settings
This section appears at the top of the Project Settings panel and includes the core project details, environment defaults, connector configuration, and dataset options.
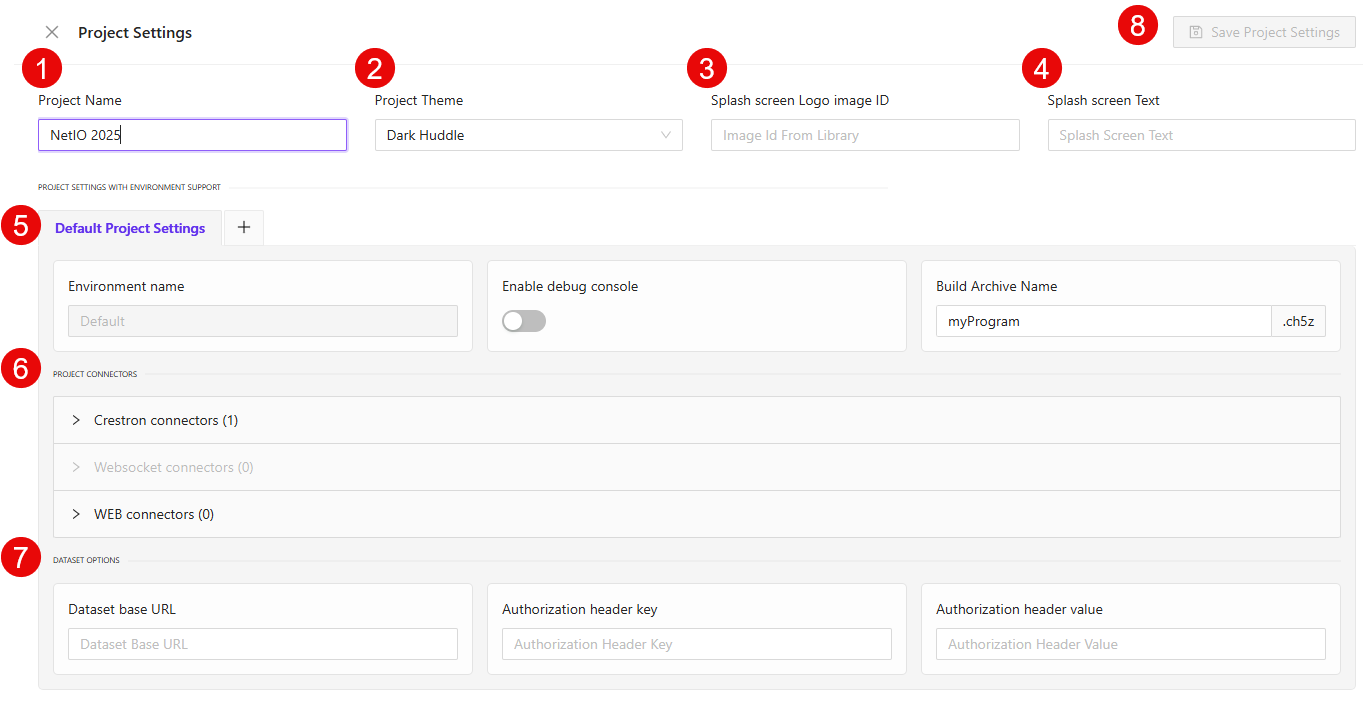
① Project Name – Editable field where you can name or rename your project. This name appears in your dashboard and project listings.
② Project Theme – Dropdown to select the design theme applied to your project.
③ Splash screen Logo image ID – Optional image ID pulled from your library, shown during the initial project loading screen.
④ Splash screen Text – Optional loading message displayed alongside the splash logo.
⑤ Default Project Settings – Displays the active environment tab. The default environment is labeled Default and cannot be renamed.
⑥ Project Connectors – This expandable section lets you connect your project to third-party services:
Crestron connectors— For hardware-based control signalsWebSocket connectors— For real-time data syncWEB connectors— For REST API integrations
⑦ Dataset Options – Configure secure access to external datasets:
Dataset base URL– Root endpoint where data is retrievedAuthorization header key– Key used in the request header (e.g.,Authorization)Authorization header value– Token or value passed with the header key
⑧ Save Project Settings – Button to save any changes. This is disabled until changes are made.
Project Settings with Environment Support
This section allows you to manage environment-specific configurations. Every project includes a default environment, but you can add additional ones to tailor builds, debug access, and archive settings.
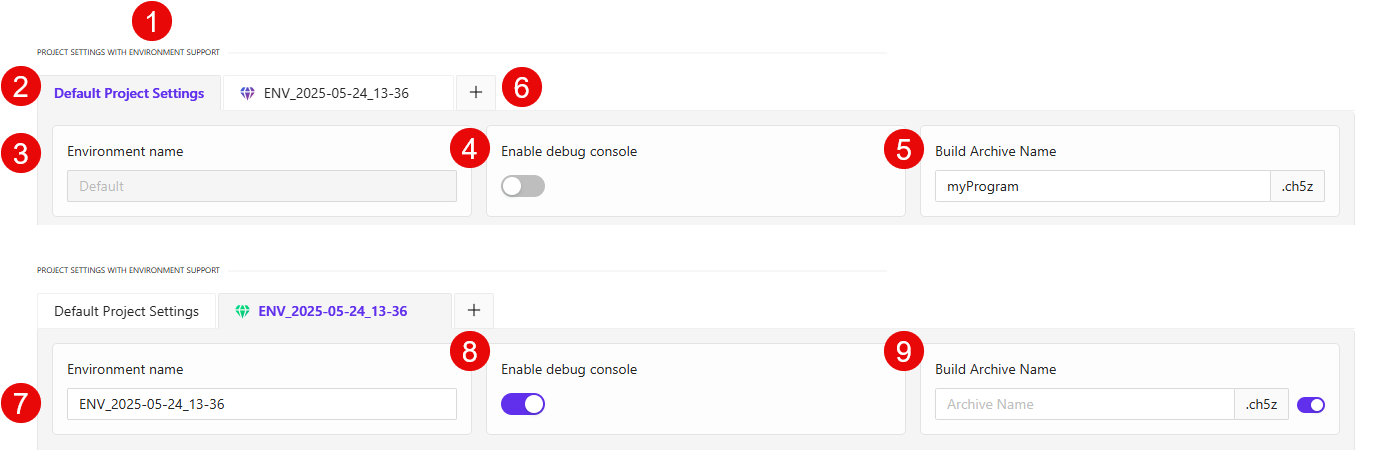
① Section Header – Identifies the area dedicated to environment-based configuration.
② Default Project Settings – The environment tab labeled Default is automatically created for every project and cannot be renamed.
③ Environment name – This field displays the current environment. For the default, it is non-editable.
④ Enable debug console – Toggle to enable or disable the debug console output for the selected environment.
⑤ Build Archive Name – Field used to define the filename for the generated .ch5z archive. For the default environment, it is editable.
⑥ Add New Environment – Click the + icon to create a new environment. Each added environment allows for independent configuration.
⑦ Custom Environment Name – In a non-default environment, this field becomes editable so you can define a custom environment name (e.g., ENV_2025-05-24_13-36).
⑧ Custom Debug Toggle – This toggle operates independently per environment, allowing you to enable or disable debugging as needed.
⑨ Custom Archive Name – You can choose to inherit the archive name from the default, or toggle to override it with a custom name specific to this environment.
Crestron Connectors
This section allows you to configure signal bindings between your AVstudio project and Crestron hardware systems. You can specify different signal types to control navigation, data handling, and connection feedback.
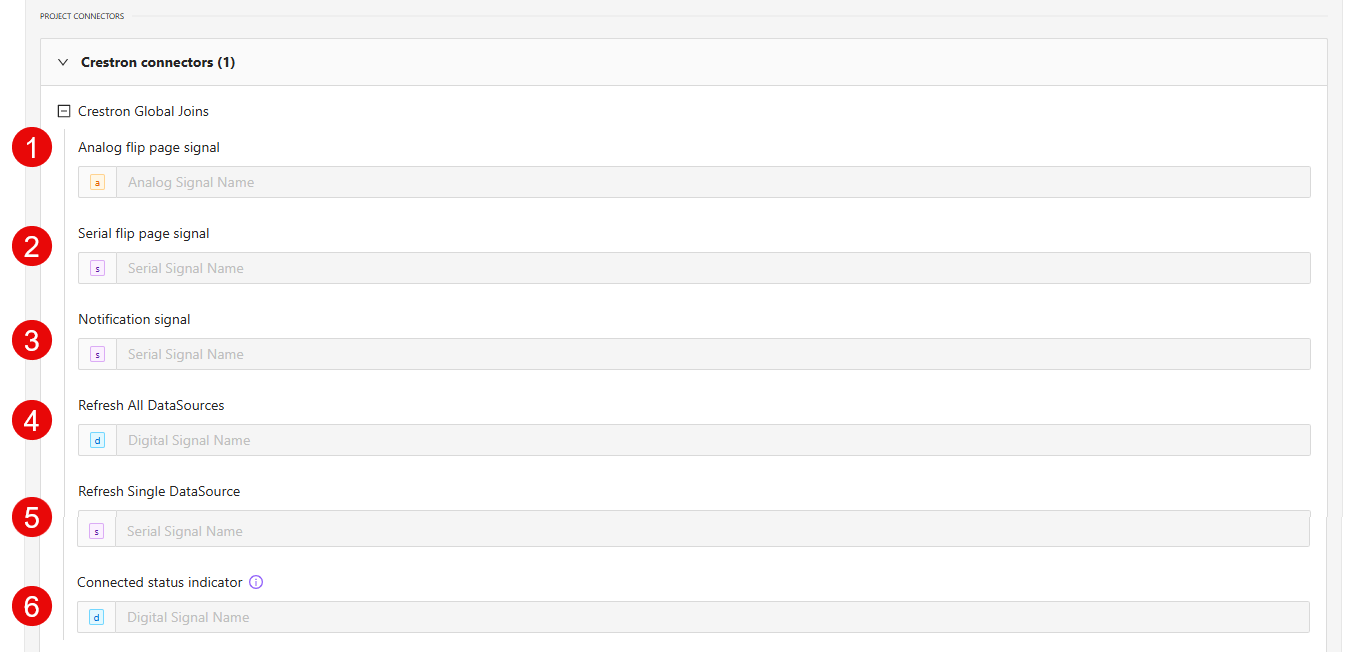
① Analog flip page signal – Assign an analog signal name to control page transitions using analog values.
② Serial flip page signal – Assign a serial signal that triggers page changes based on string input.
③ Notification signal – Assign a serial signal to trigger in-app notifications from Crestron events.
④ Refresh All DataSources – Assign a digital signal that refreshes all data sources at once.
⑤ Refresh Single DataSource – Assign a serial signal to refresh a specific data source.
⑥ Connected status indicator – Assign a digital signal that visually indicates whether the Crestron system is connected.
WebXpanel and Additional Connectors
This section allows you to configure WebXpanel settings within Crestron connectors and expand additional integration options for WebSocket and WEB connectors.
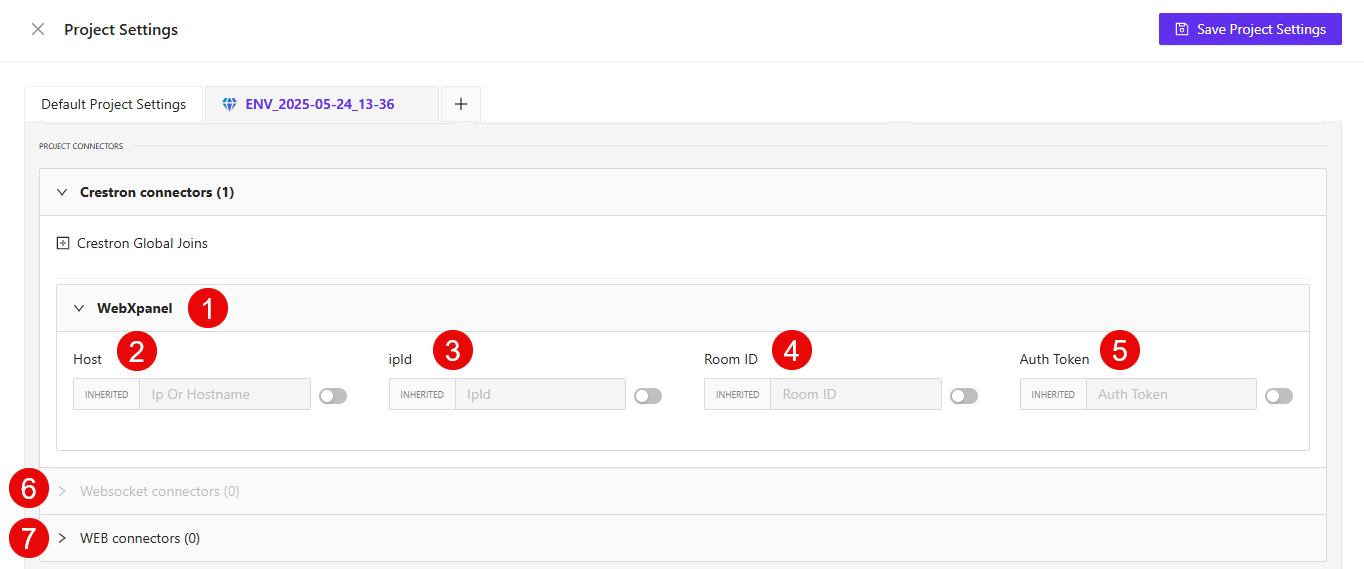
① WebXpanel – This block allows you to configure WebXpanel integration settings. All fields support inheritance or manual override using the toggle.
② Host – The IP address or hostname of the Crestron device. Toggle off inheritance to manually enter the value.
③ IPID – The IPID (IP Identifier) used to communicate with the control system.
④ Room ID – An optional identifier for defining which room the session should connect to.
⑤ Auth Token – An optional authentication token used for secure access to the Crestron system.
⑥ WebSocket connectors – Expandable section to configure real-time socket-based data exchange with external systems. The number in parentheses indicates how many connectors are currently defined.
⑦ WEB connectors – Expandable section for setting up standard HTTP/REST API integrations. This may include external services or middleware endpoints.
Dataset Options
This section allows you to configure the API endpoint and authorization settings used to fetch external data into your project. Each field supports environment-specific overrides using the Inherited toggle.
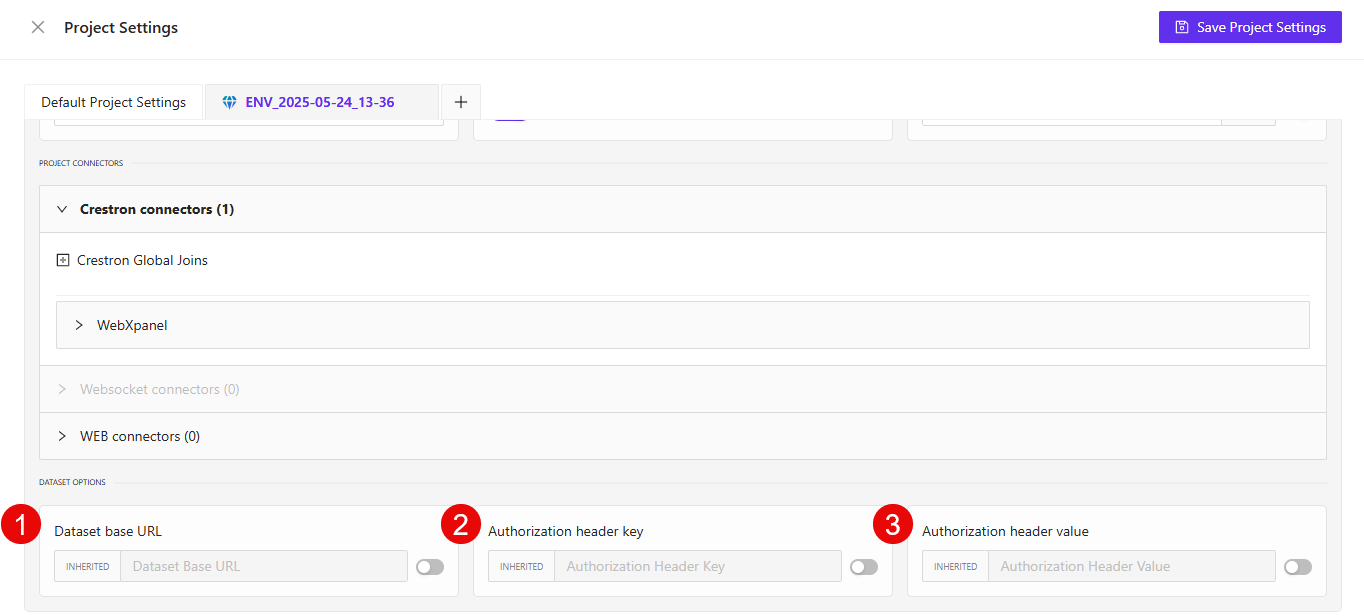
① Dataset base URL – The base URL or endpoint where the dataset is hosted. Toggle off inheritance to manually define this for the current environment.
② Authorization header key – Header key used to send authorization credentials (e.g., Authorization).
③ Authorization header value – The actual token or credential passed with the header key. This is typically a bearer token or API key.